* This article is from our Tip of the Day newsletter. Sign Up. *
Want to find out which of your contacts or apps has access to your private data? There is a handy iPhone security check feature that allows you to review all of your contacts and apps, and revoke access to private information, such as your location, photos, Bluetooth, and more. Find out how to run a security check on iPhone below.
Why You’ll Love This Tip:
- Check which of your contacts has access to private data like location or photos.
- Revoke privacy access from apps that you don’t want tracking your location or other information.
How To Run a Security Check on iPhone
System Requirements
This tip works on iPhones running iOS 17 or later. Find out how to update to the latest version of iOS.
The iPhone’s security checkup feature allows you to quickly review all of your contacts and see who has access to what. Then, you’ll be able to go over all your apps and see what privacy-related data they have access to. Throughout the process, you’ll be able to revoke access with a simple tap. Here’s how to run a security check on iPhone:

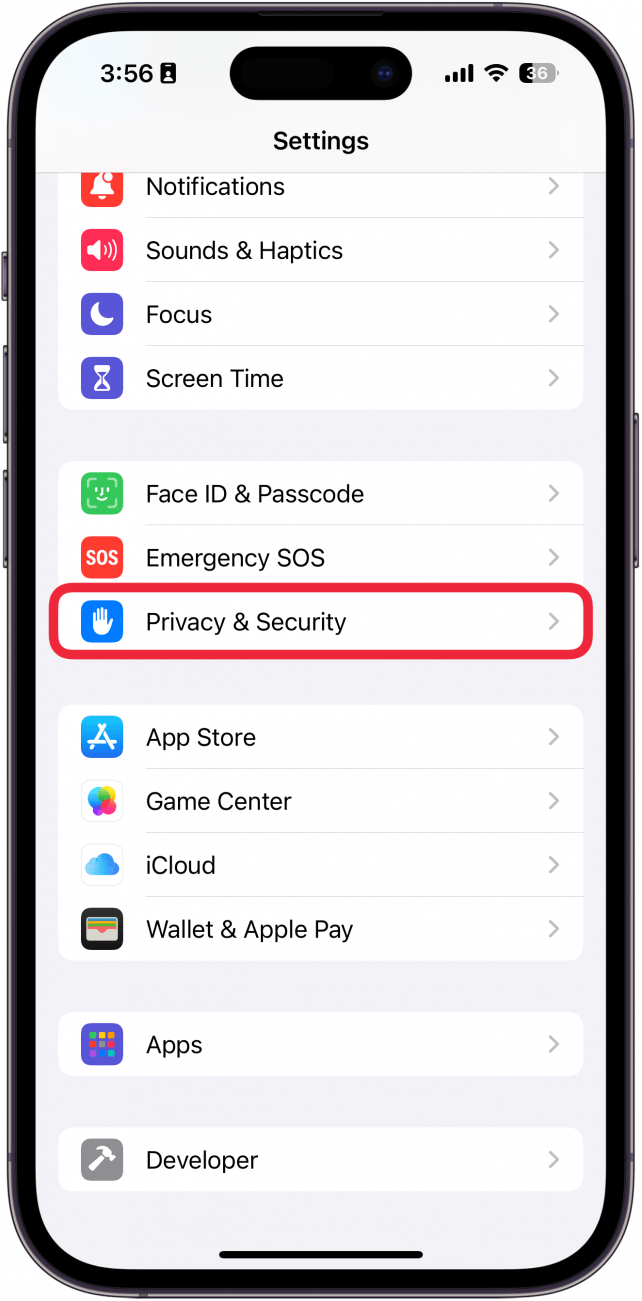
- Open the Settings app, and select Privacy & Security.
![iphone settings app with a red box around privacy and security]()
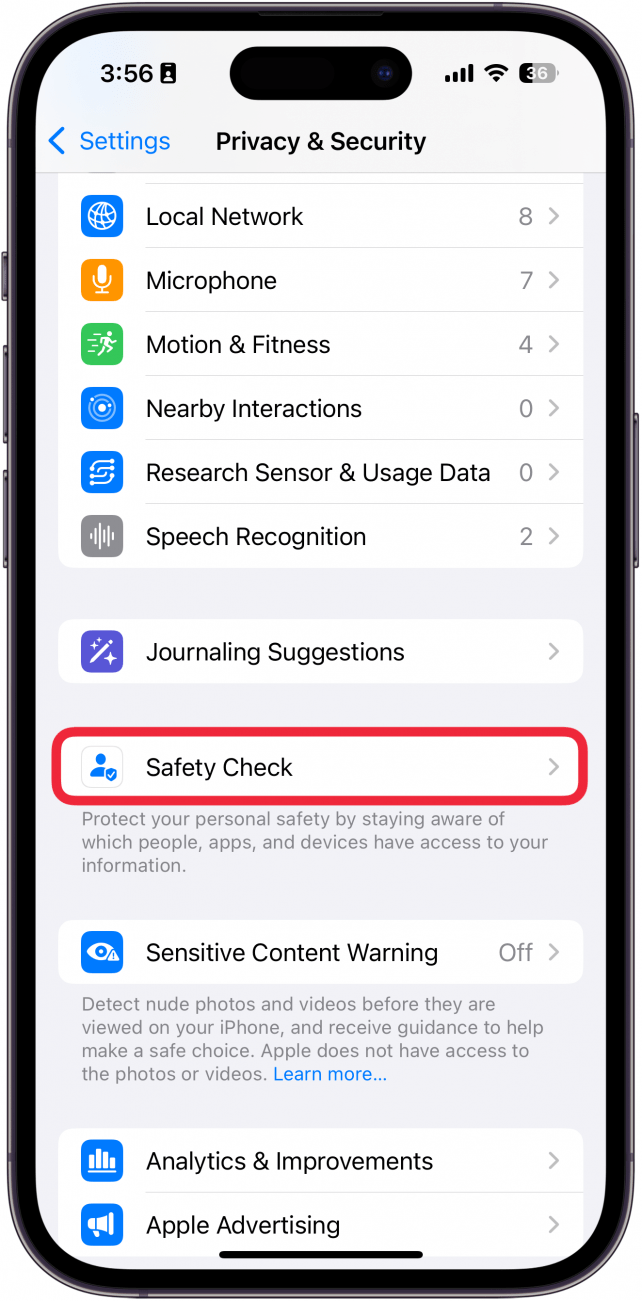
- Scroll down, and tap Safety Check.
![iphone privacy and security settings with a red box around safety check]()
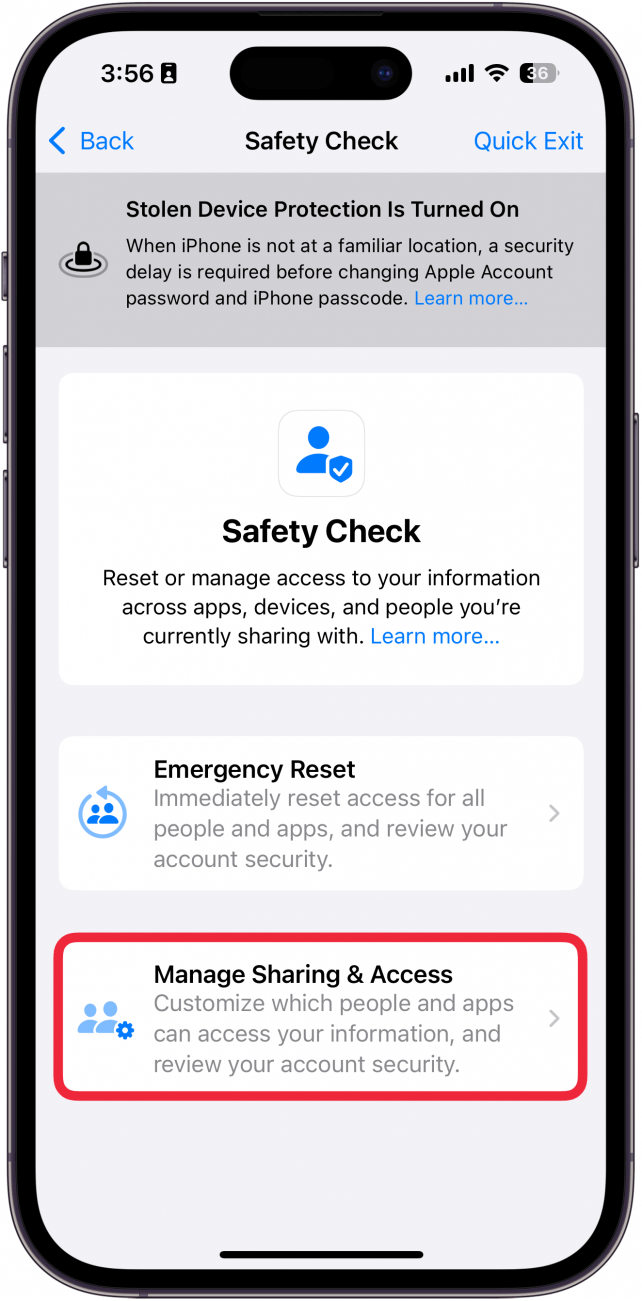
- Tap Manage Sharing and Access.
![iphone safety check with a red box around manage sharing and access]()
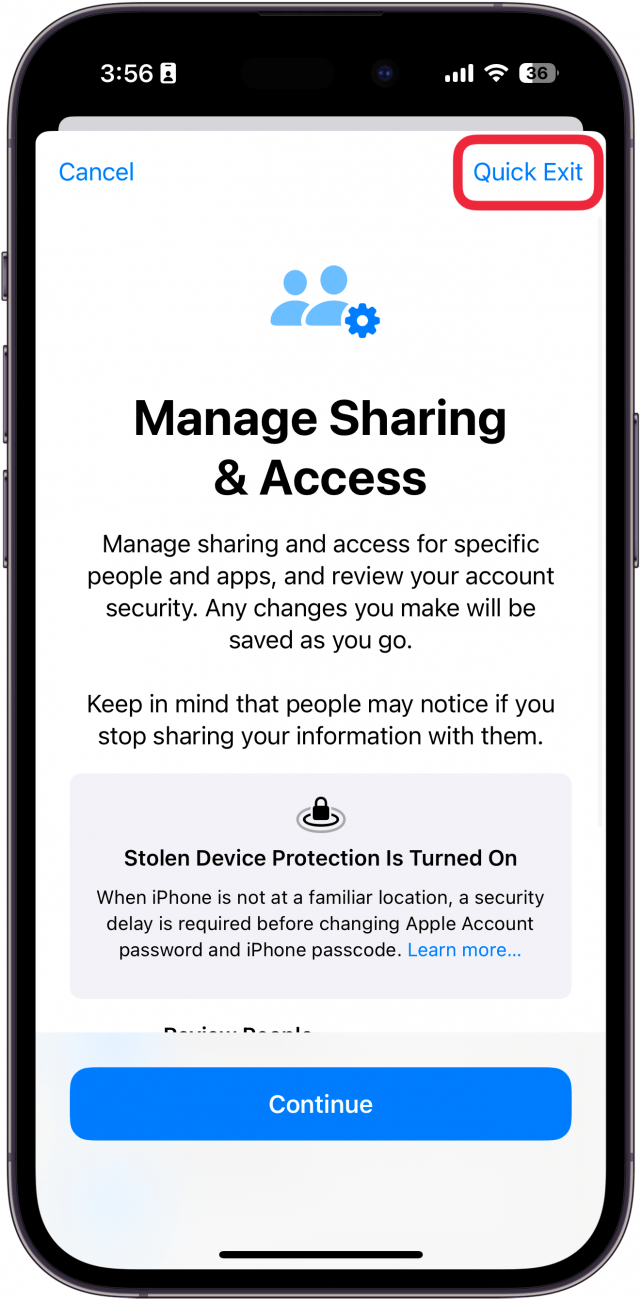
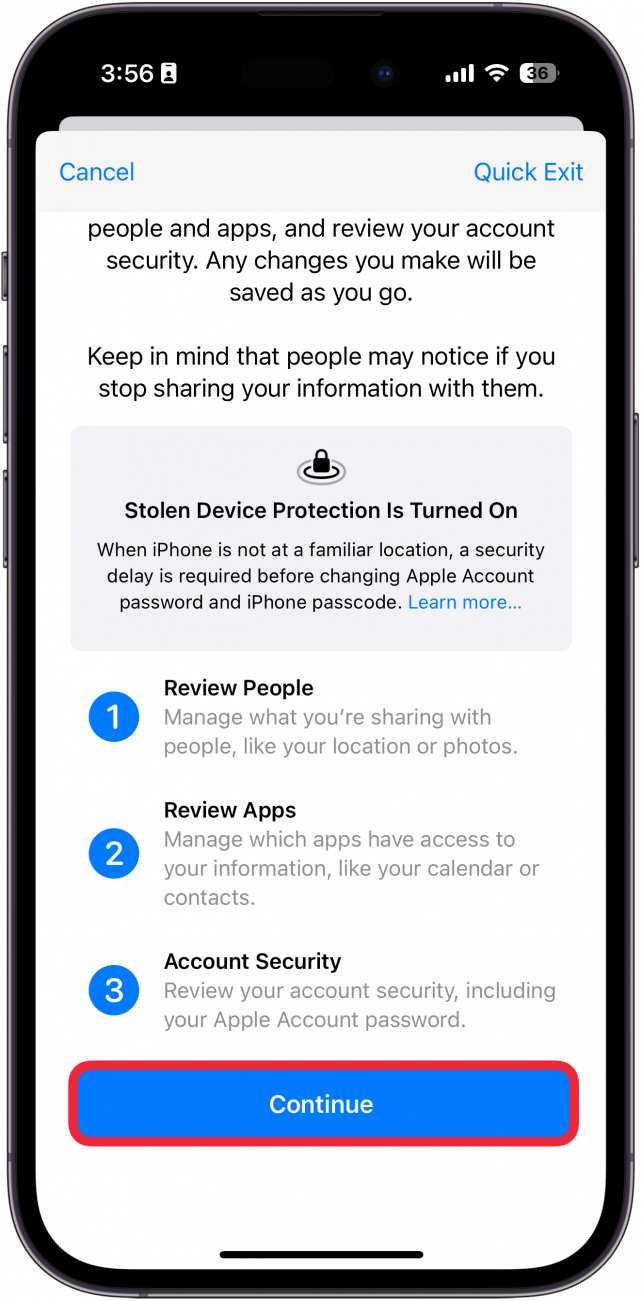
- You’ll be presented with an overview of how this process works. Note that at any time during this process, you can tap Quick Exit to immediately close the Settings app.
![iphone manage sharing and access with a red box around quick exit]()
- Once you’ve finished reading the explanation, tap Continue.
![iphone manage sharing and access with a red box around continue]()
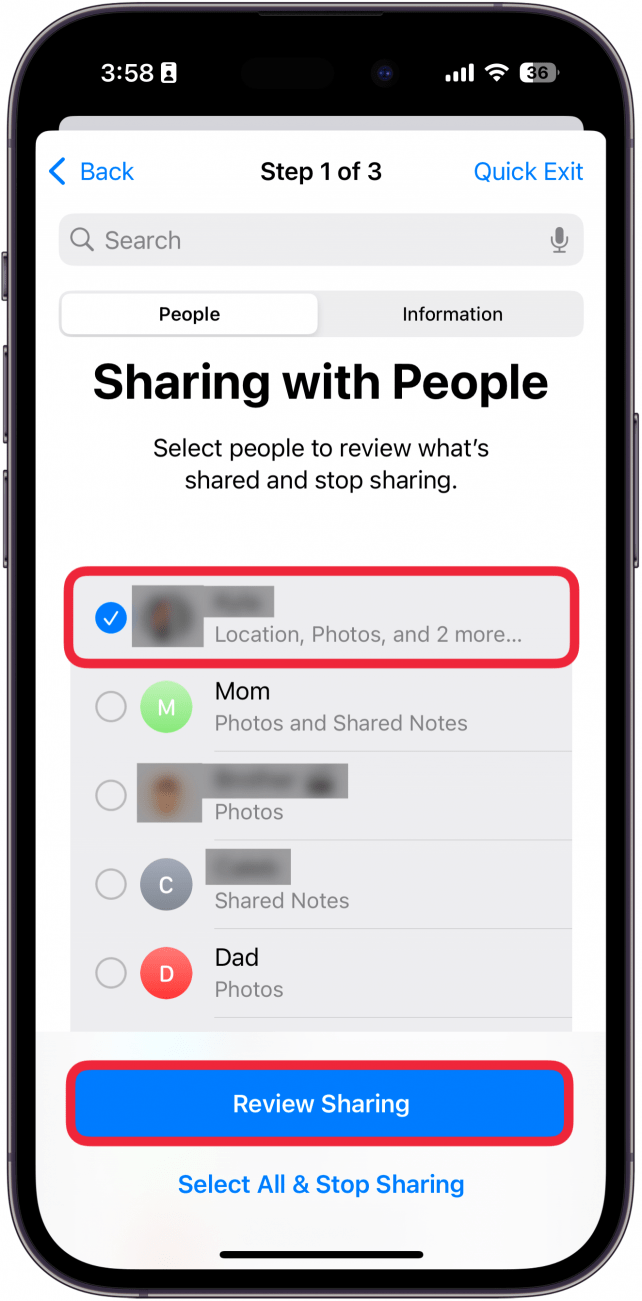
- In the list of people, tap a person and select Review Sharing.
![iphone manage sharing and access displaying a list of contacts with a red box around one contact and a red box around review sharing]()
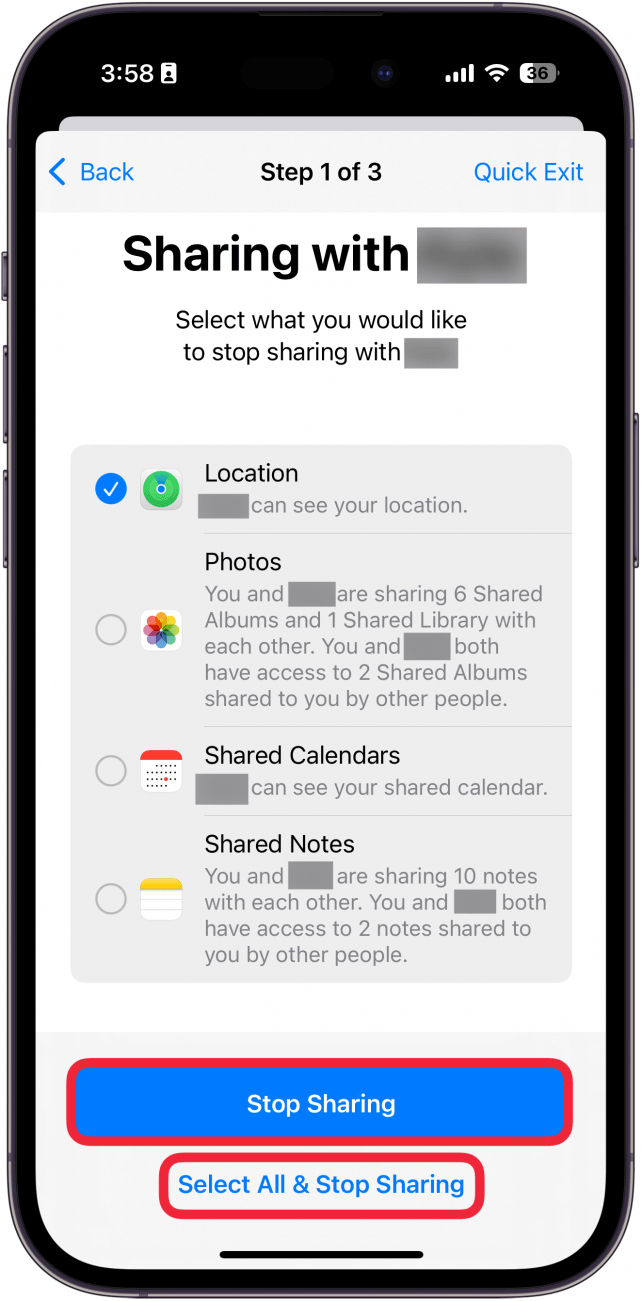
- In the list, select which data you want to stop sharing, and then tap Stop Sharing. You can also tap Select All & Stop Sharing if you want to stop sharing everything.
![iphone manage sharing and access displaying permissions that a contact has with a red box around stop sharing and a red box around select all & stop sharing]()
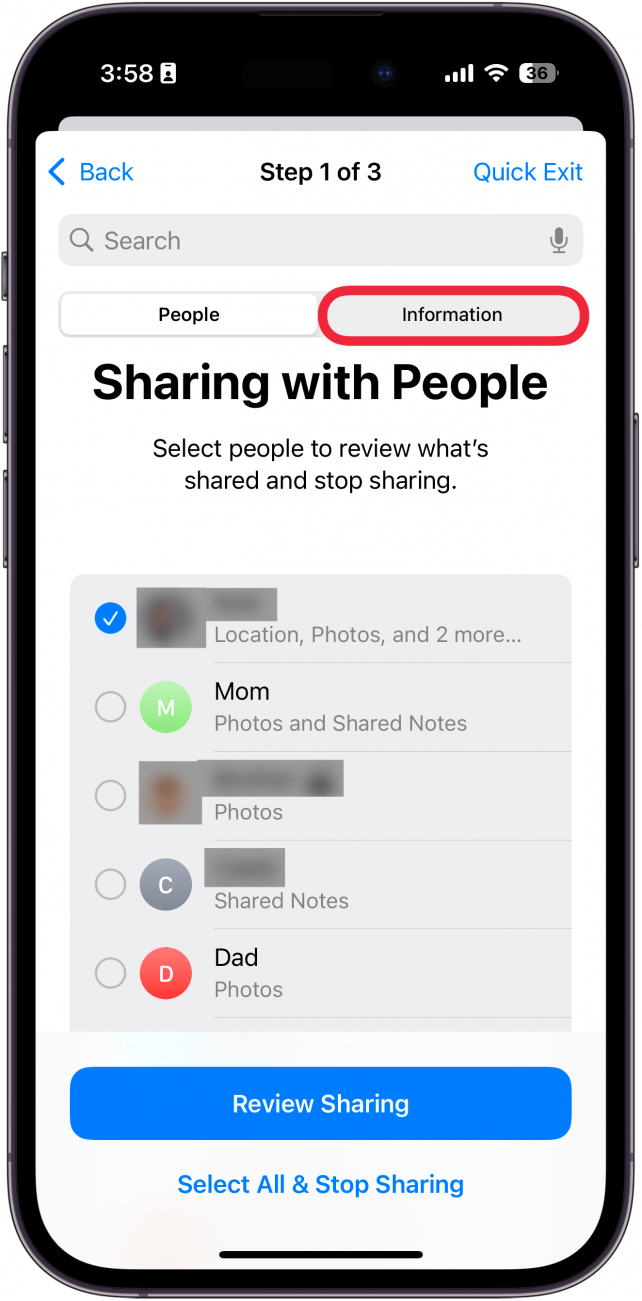
- Instead of going through person by person, you can also tap the Information tab.
![iphone manage sharing and access displaying a list of contacts with a red box around information tab]()
- In the information tab, select from one of the options to review who has access to this data. For example, you can tap Location and then select Review Sharing.
![iphone manage sharing and access contact information tab with a red box around location and a red box around review sharing]()
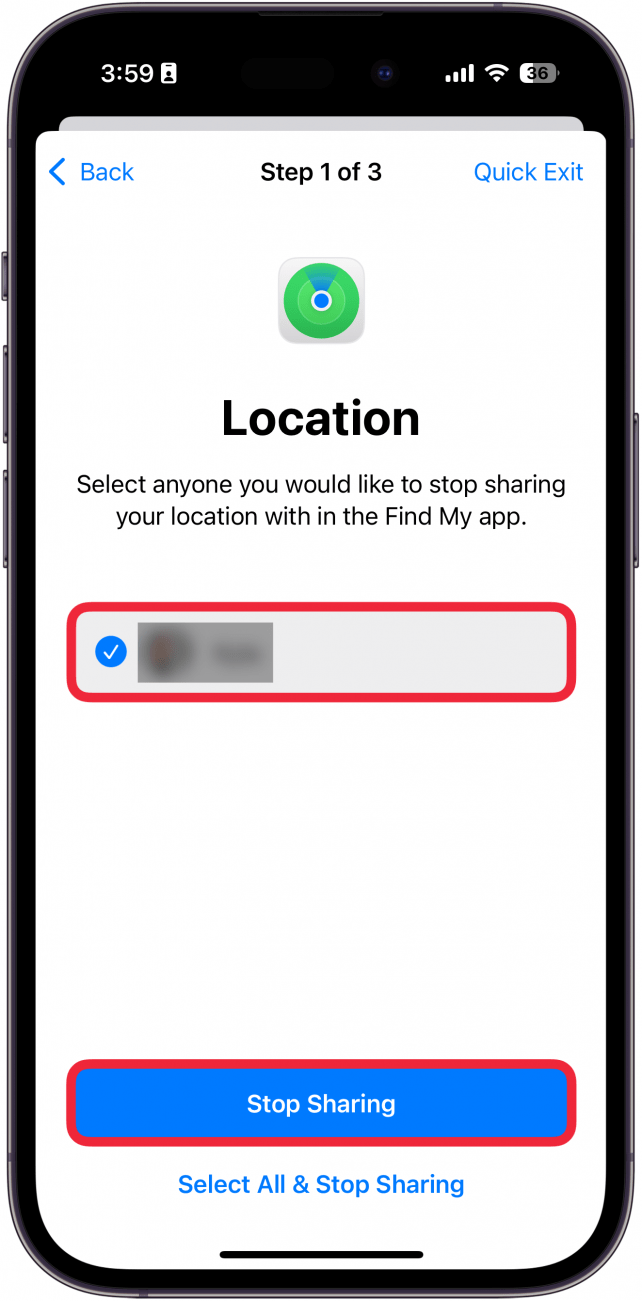
- You will then see a list of people with whom you are sharing this data. Select the person and tap Stop Sharing if you do not want them to have access to this information.
![iphone manage sharing and access location sharing with a red box around a contact and a red box around stop sharing]()
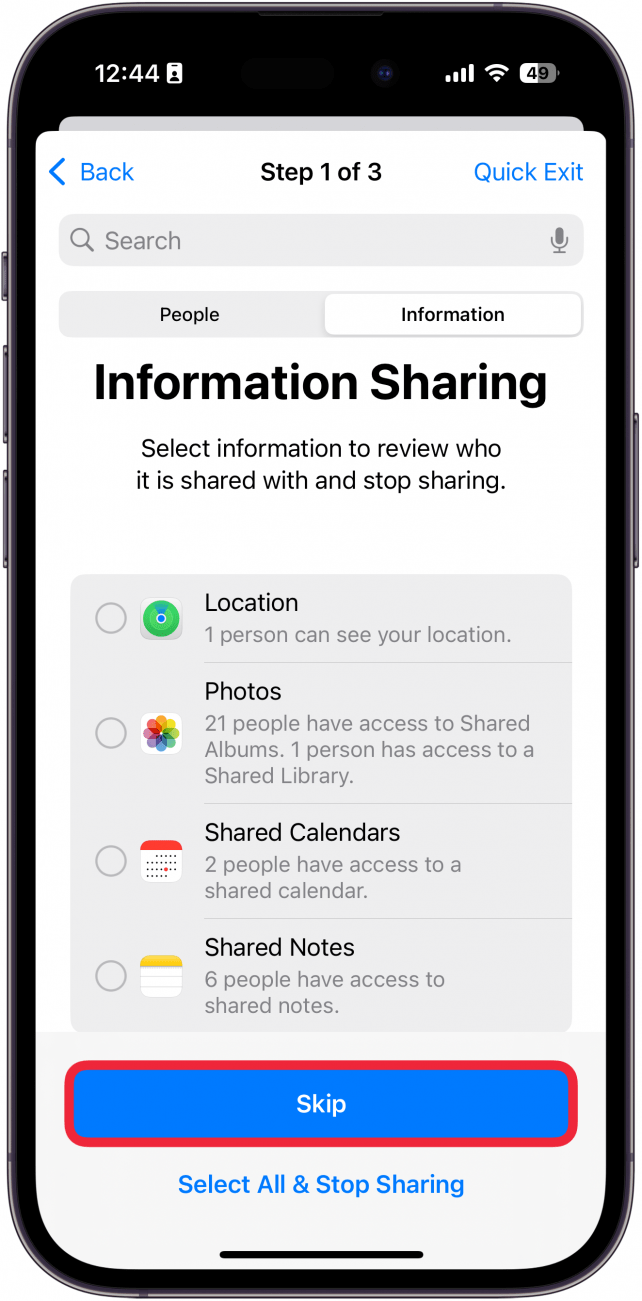
- Alternatively, if everything looks good, tap Skip.
![iphone manage sharing and access contact information tab with a red box around skip]()
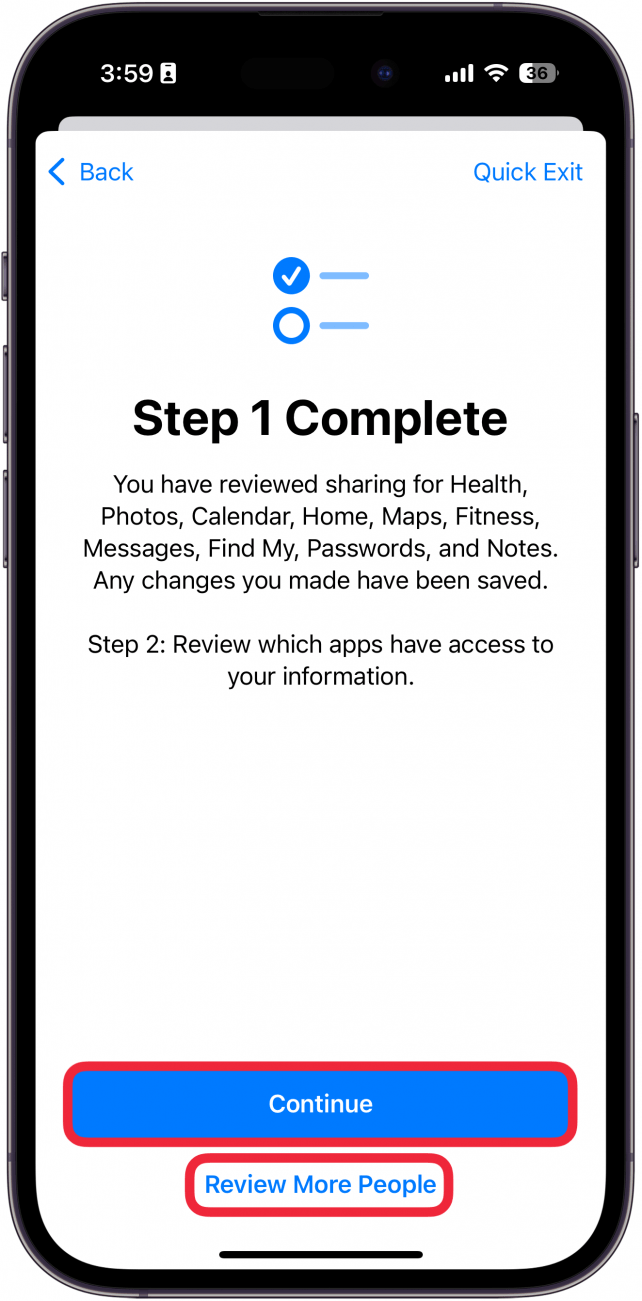
- Once you are done, you will have completed Step 1. You can tap Continue to move on to Step 2 or tap Review More People if there are other contacts you want to stop sharing data with.
![iphone manage sharing and access displaying a screen that step 1 is complete and red box around around continue and review more people]()
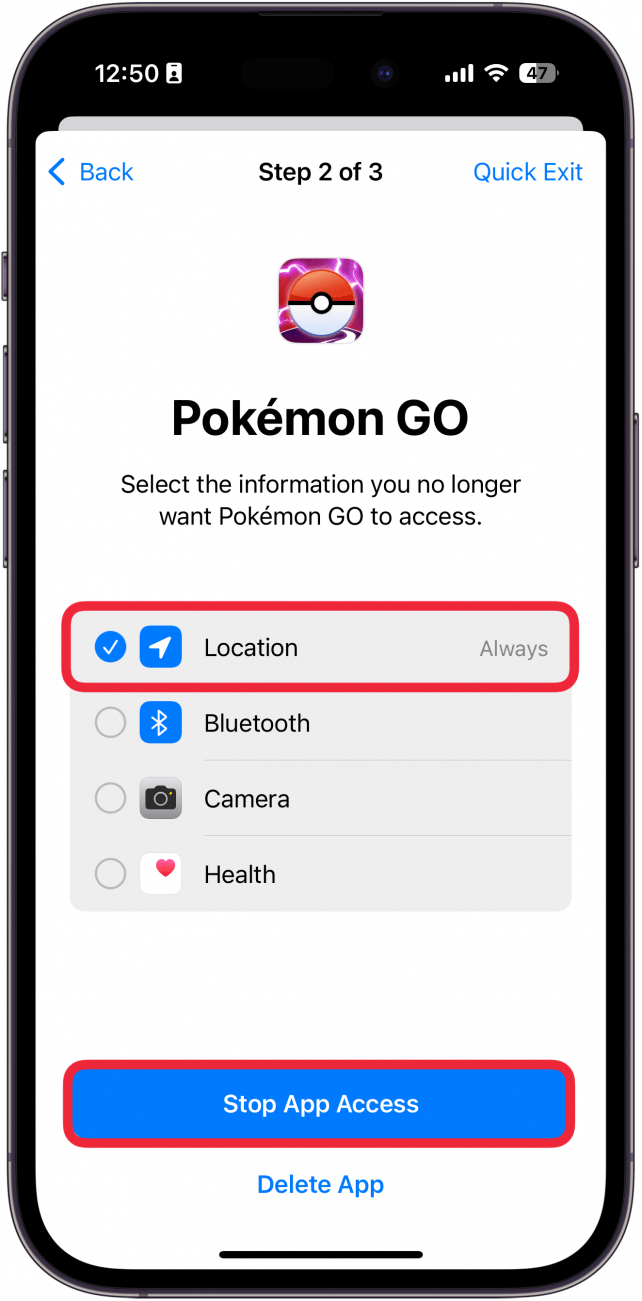
- In Step 2, you will be able to review apps. Select an app, and tap Stop Access.
![iphone manage sharing and access app access screen with a red box around pokemon go and a red box around stop app access]()
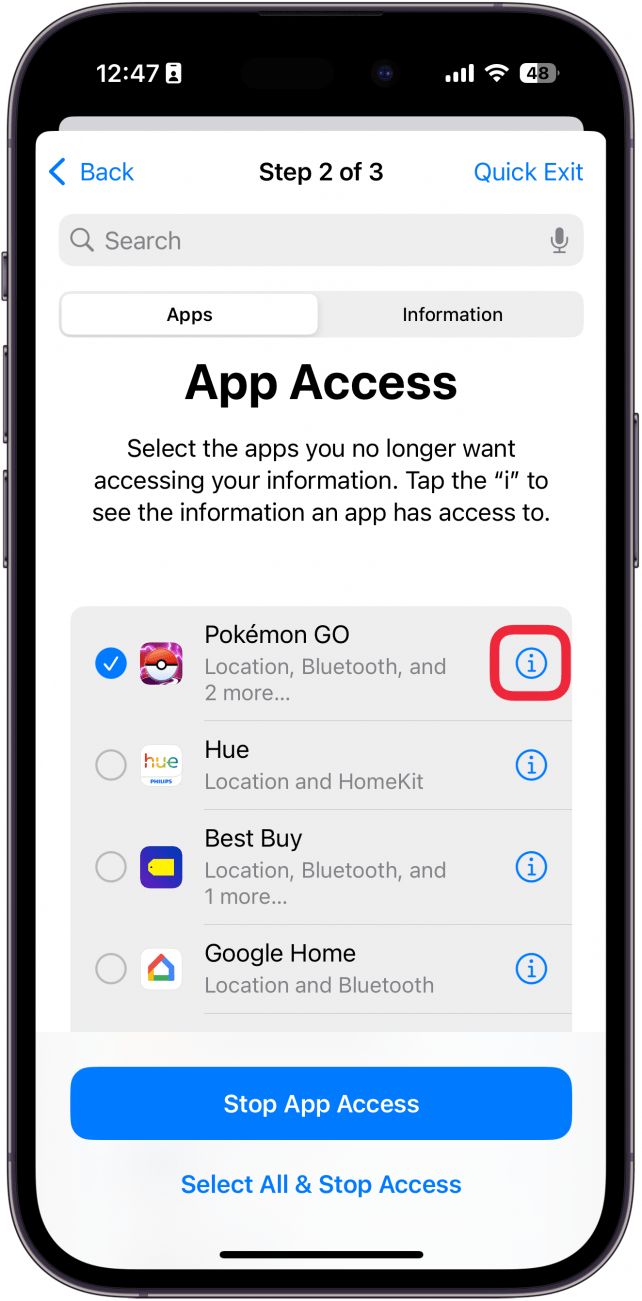
- You can also tap the information icon to check which data the app has access to.
![iphone manage sharing and access app access screen with a red box around information icon]()
- Here, you can select what information for which you want to remove access and tap Stop App Access.
![iphone manage sharing and access app access screen displaying pokemon go details with a red box around location and a red box around stop app access]()
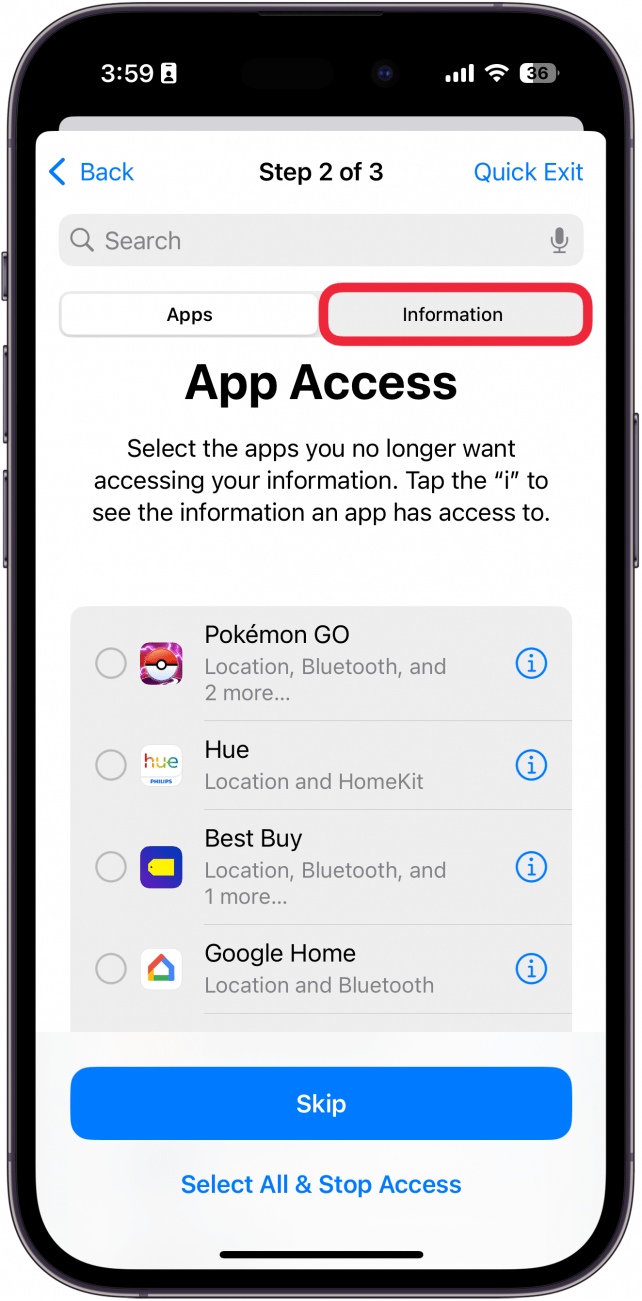
- Instead of reviewing each app individually, you can tap the Information tab.
![iphone manage sharing and access app access screen with a red box around information tab]()
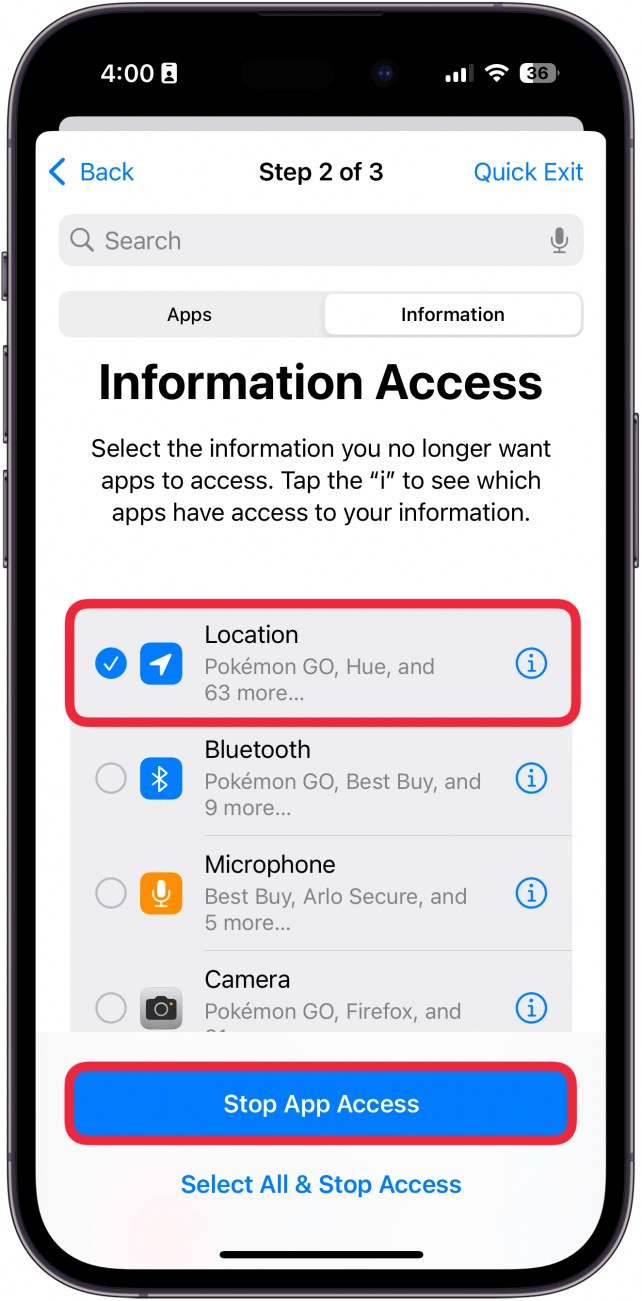
- In the Information tab, you can tap any of the privacy-related data for which you want to revoke access. For example, if you tap Location and then select Stop App Access, it will remove location permissions from every app that is currently accessing it.
![iphone manage sharing and access app access information tab with a red box around location and a red box around stop app access]()
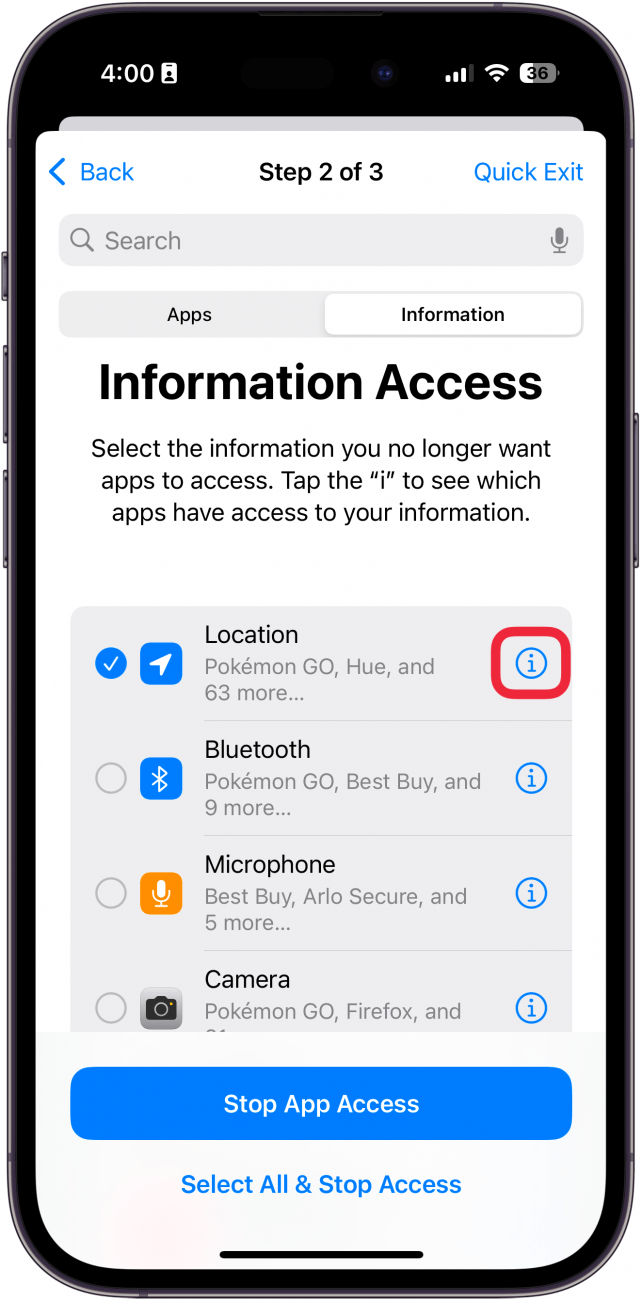
- If you don’t want to remove every app’s permission, tap the information icon.
![iphone manage sharing and access app access information tab with a red box around information icon]()
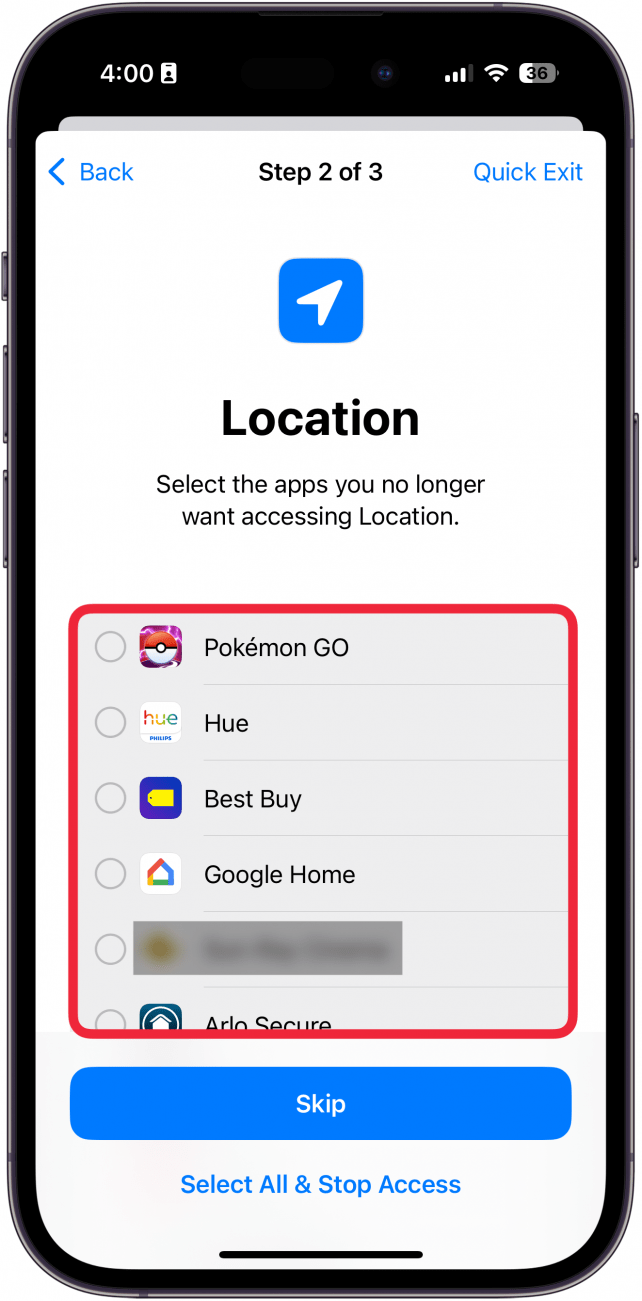
- You can then select from the list of apps for which you want to stop access.
![iphone manage sharing and access displaying a list of apps that have access to the user's location]()
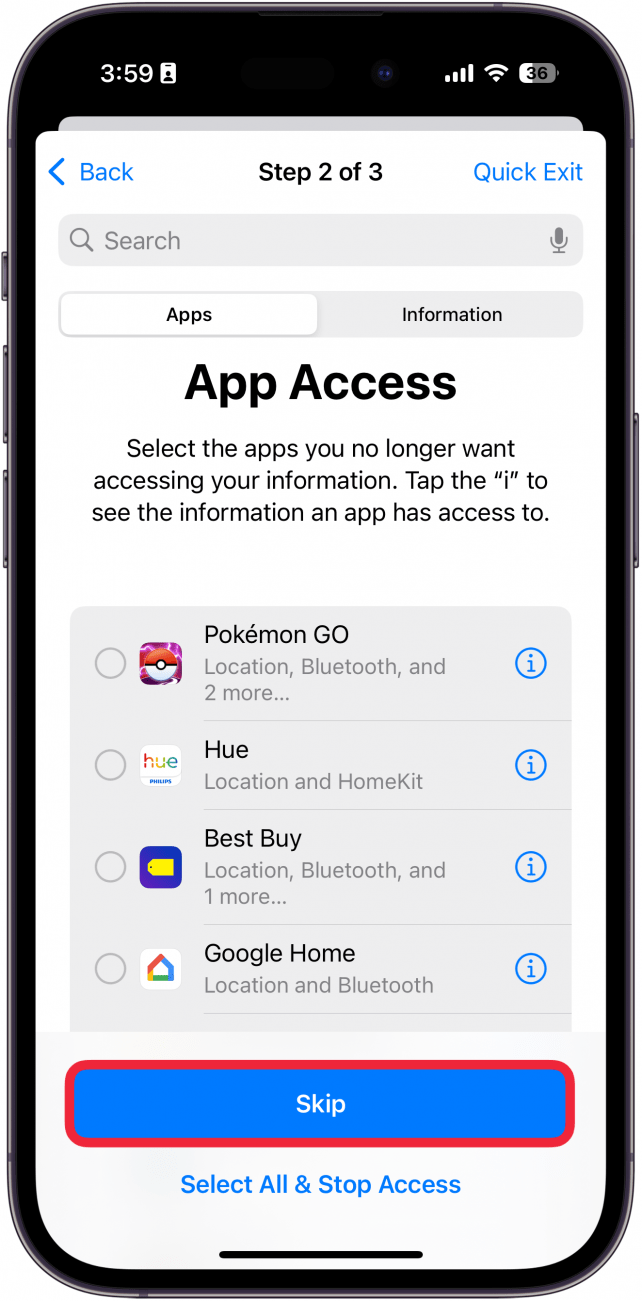
- Alternatively, if you are satisfied with your current app permissions, you can tap Skip.
![iphone manage sharing and access displaying a list of apps that have access to the user's location, with a red box around skip]()
- After completing Step 2, you can tap Continue to move on to Step 3 or select Review More Apps if you want to continue removing apps.
![iphone manage sharing and access displaying a screen indicating that step 2 is complete, with a red box around continue and review more apps]()
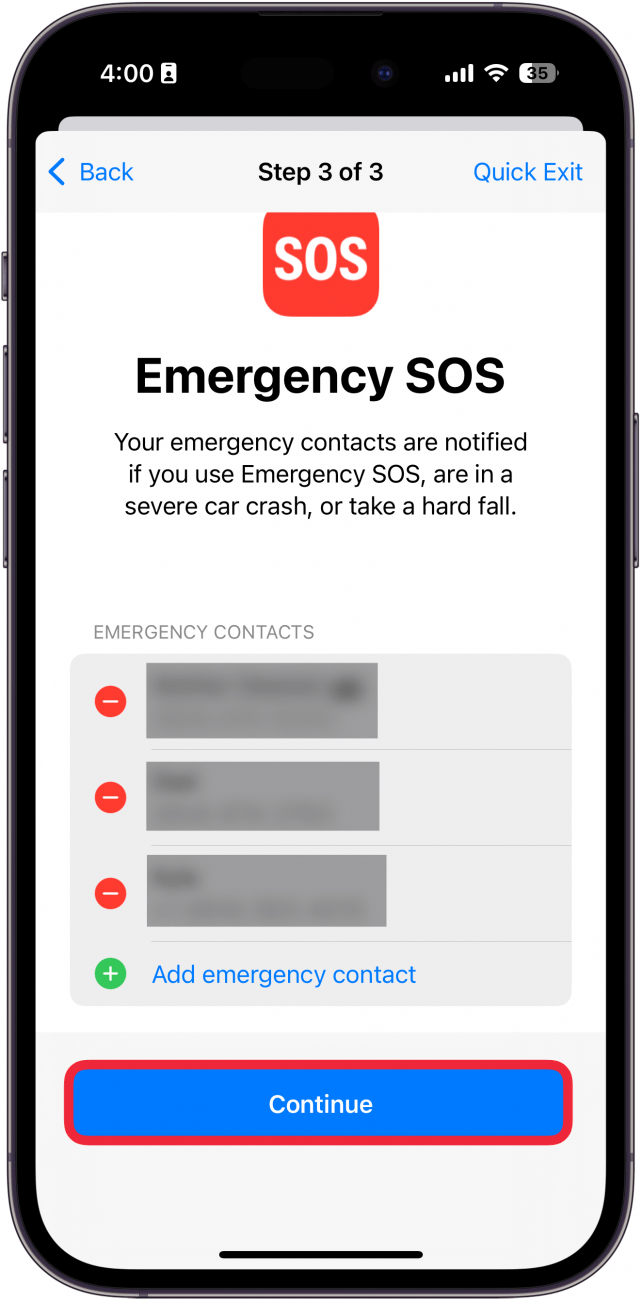
- In Step 3, you can review your current emergency contacts. Tap the minus icon to remove them, or tap Add Emergency Contact to add a new one.
![iphone manage sharing and access displaying emergency contacts, with a red box around one contact with a minus sign next to it and a red box around the add emergency contact button]()
- Tap Continue.
![iphone manage sharing and access displaying emergency contacts, with a red box around continue]()
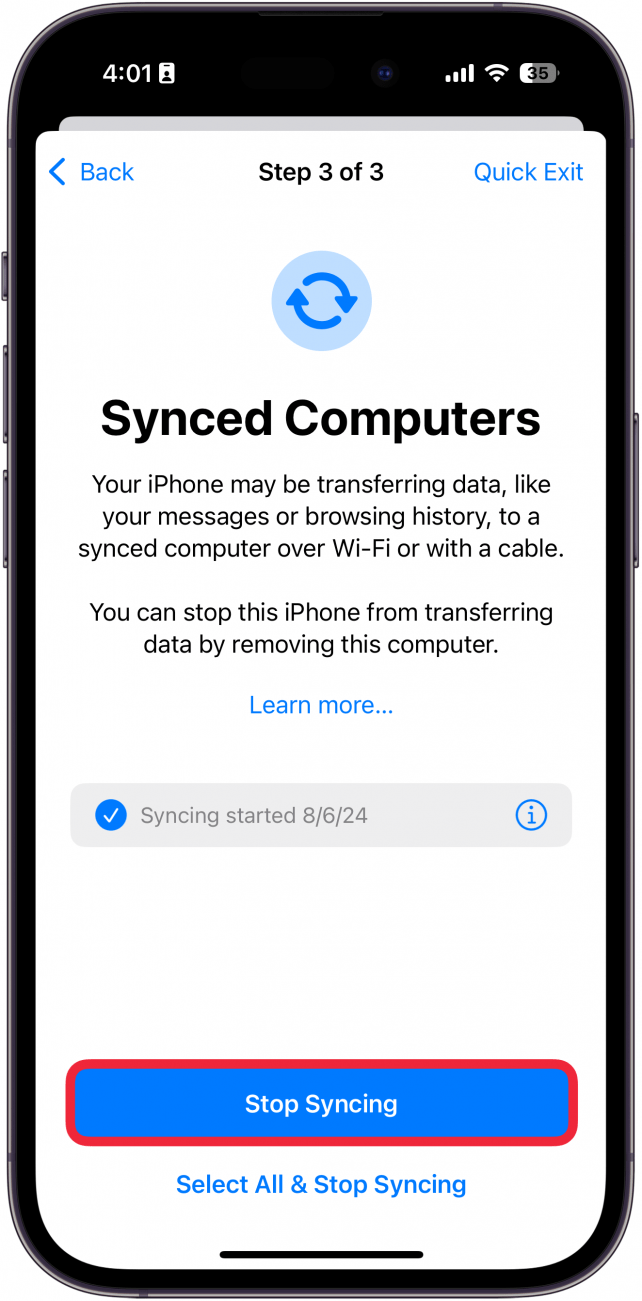
- Next, you can choose to Stop Syncing with computers.
![iphone manage sharing and access synced computers screen with a red box around stop syncing]()
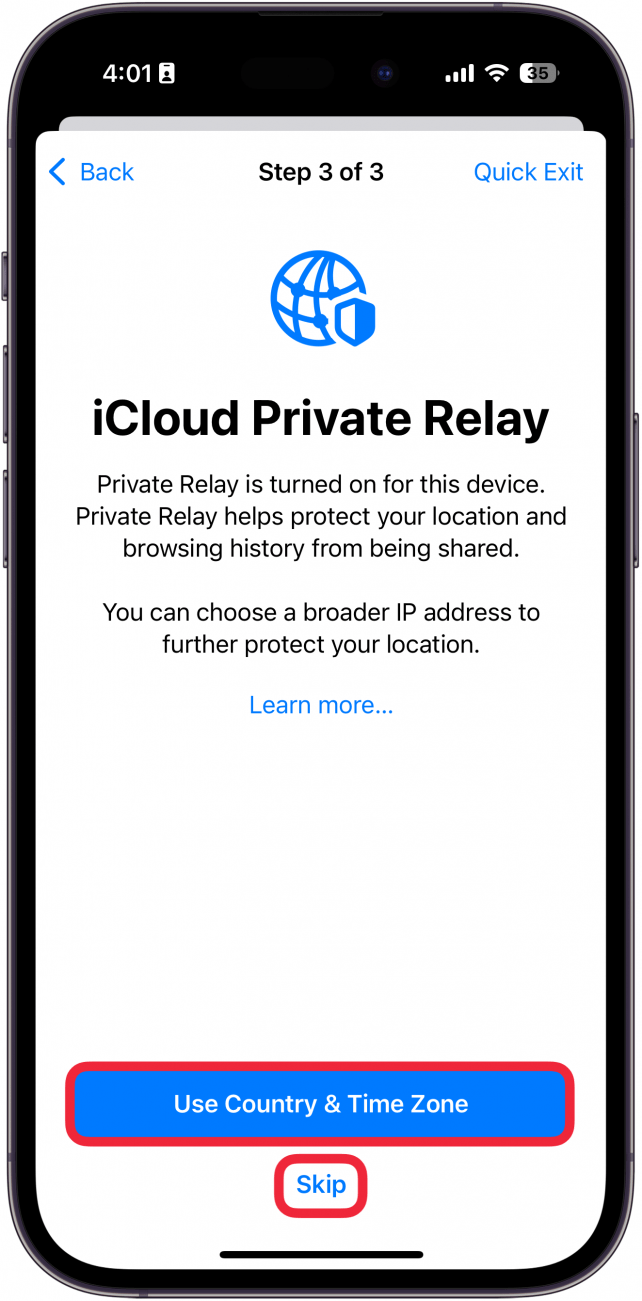
- If you have iCloud Private Relay enabled, you can opt to choose a broader IP address to mask your location. Tap Use Country & Time Zone for a broader IP address or select Skip if you don’t want one.
![iphone manage sharing and access icloud private relay screen with a red box around use country and time zone and a red box around skip]()
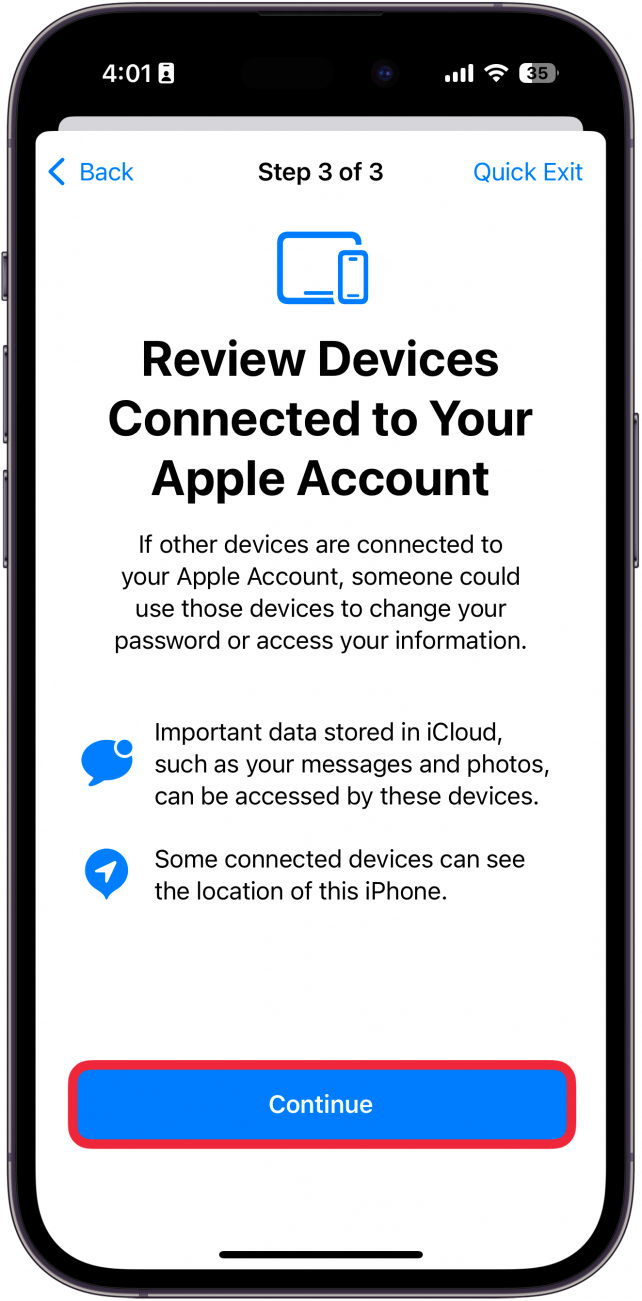
- Next, you’ll review devices connected to your Apple Account. Tap Continue.
![iphone manage sharing and access review devices screen with a red box around continue]()
- You can select multiple devices in the list, or tap the information icon to review devices individually.
![iphone manage sharing and access connected devices screen with a red box around information icon]()
- Tap Remove from Account if you do not recognize the device or you no longer have access to it.
![iphone manage sharing and access displaying details for an apple watch with a red box around remove from account]()
- Next, you can Update the Password for your Apple Account or Update Later in Settings.
![iphone manage sharing and access update password screen with a red box around update password and a red box around update later in settings]()
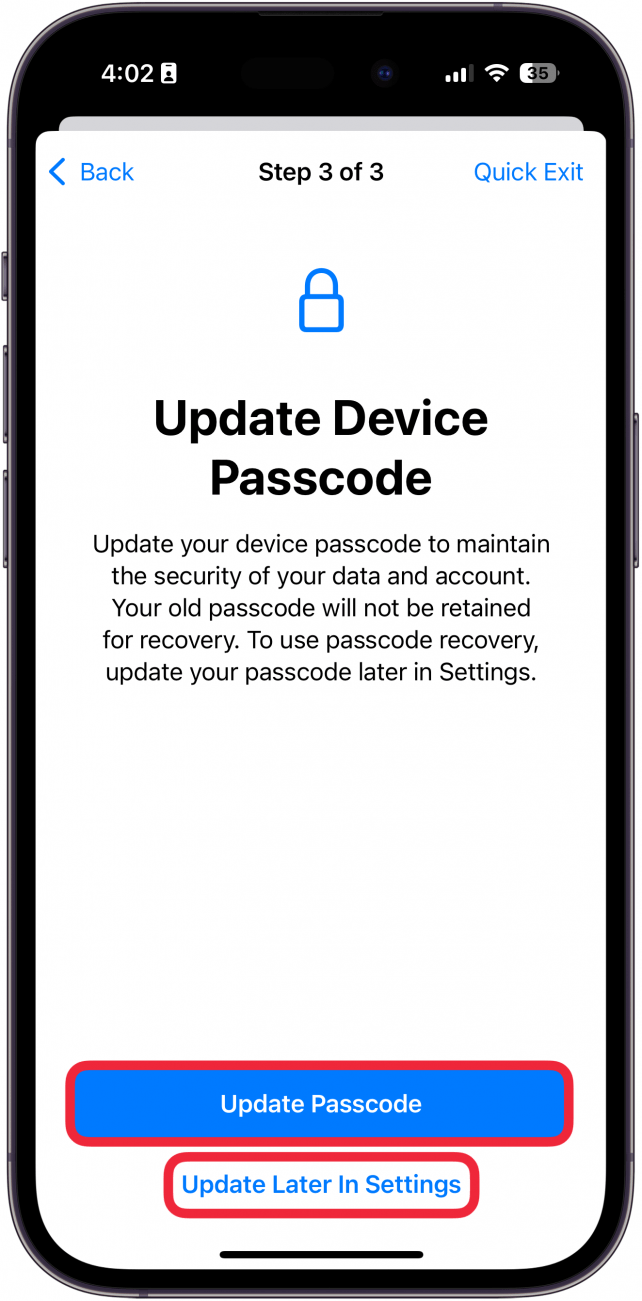
- You can also Update the Passcode for your iPhone or Update Later in Settings.
![iphone manage sharing and access update passcode screen with a red box around update passcode and a red box around update later in settings]()
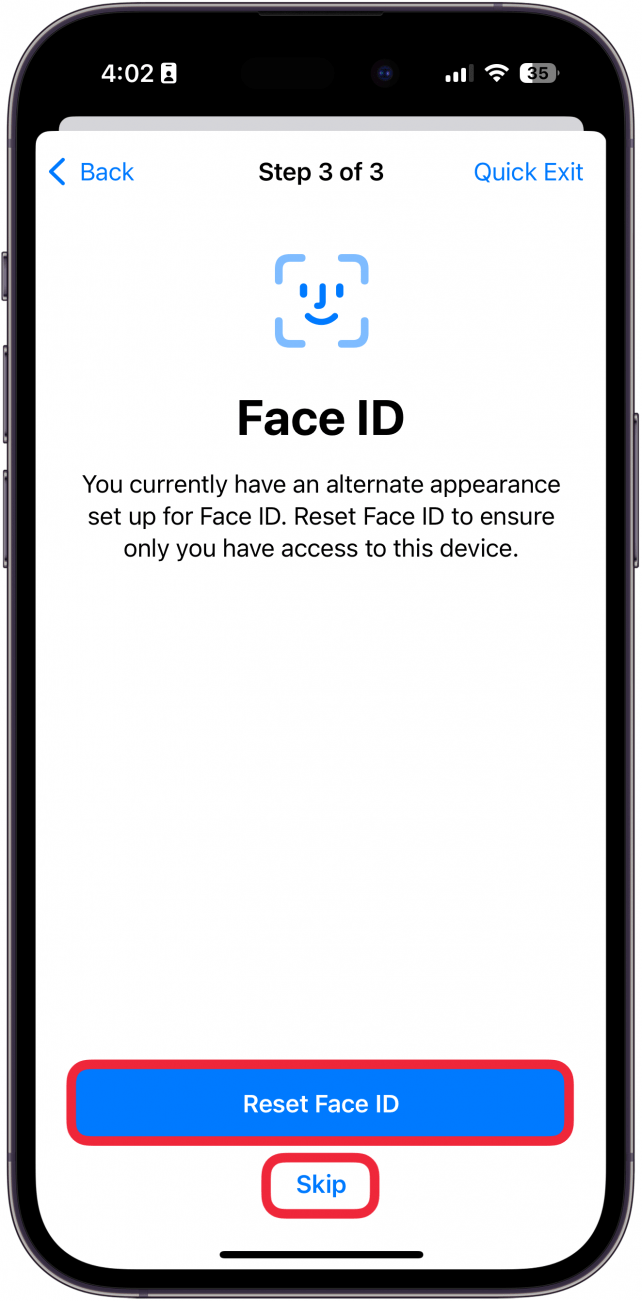
- You can Reset Face ID to ensure only you have access to this device or tap Skip.
![iphone manage sharing and access reset face id screen with a red box around reset face id and a red box around skip]()
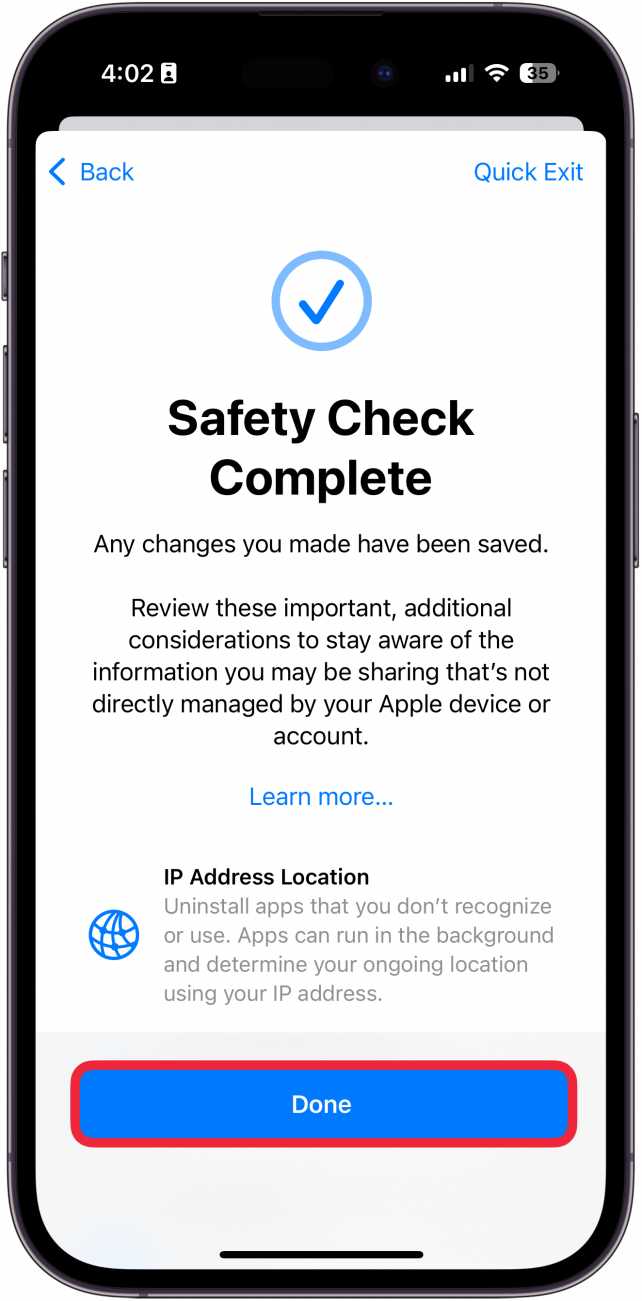
- Your Safety Check is complete. Tap Done to finish.
![iphone manage sharing and access checkup complete screen with a red box around done]()
That’s how to use the iPhone’s Safety Check feature. Next, find out how to do an Emergency Reset on your iPhone using Safety Check.
