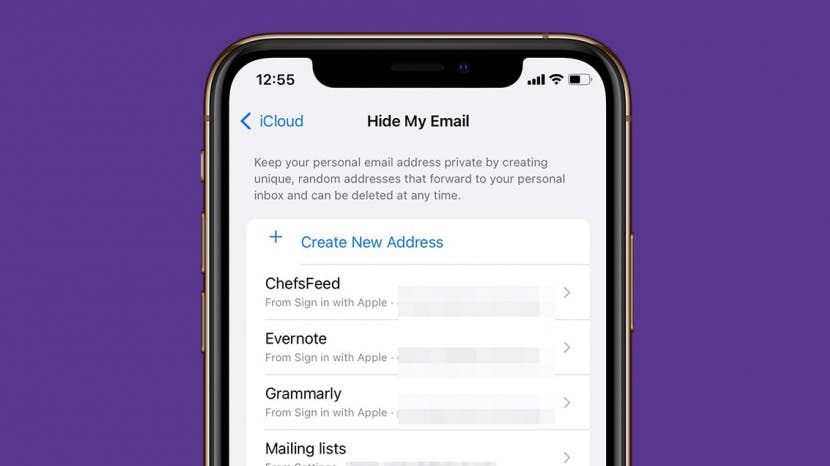
Apple has let you create unique, dummy email addresses to mask your personal email address for a while, so long as you are able to use Sign in with Apple. Now, this service is expanding to any online form that requires an email address. With iOS 15, iPadOS 15, and macOS Monterey, if you have iCloud Plus, you can now sign up for any account or mailing list with a dummy email address and have all information sent to that address forwarded to your personal inbox. We'll go over why you might want to use this service and how to do it.
Related: How to Opt Out of App Tracking with Apple's New Feature in iOS 14.5
Jump To:
- Why Use Hide My Email?
- How to Use Hide My Email on iOS 15 & iPadOS 15
- How to Use Hide My Email in macOS Monterey
Why Use Hide My Email?
Like many other recent Apple features, including iCloud+ Private Relay, App Tracking Transparency, and App Privacy Report, Hide My Email is designed to help protect your privacy. When you create a dummy email address using Hide My Email, you can use that address to sign up for services or correspond directly with a business or individual without them ever having access to your personal email account or identity. You can even respond to emails forwarded to your personal account without revealing your email address, according to Apple. An additional bonus is that Apple makes it easy to stop receiving emails from any organization or individual—you can just turn off forwarding by deactivating.

To learn more about privacy features for your Apple devices, check out our Tip of the Day newsletter.
How to Use Hide My Email on iOS 15 & iPadOS 15
Before you activate Hide My Email, you'll need to sign up for iCloud Plus. Don't worry, it's easy, and we'll cover it in the steps below.
Activate Hide My Email
- Open Settings.
![Settings]()
- Tap on your profile.
![Profile]()
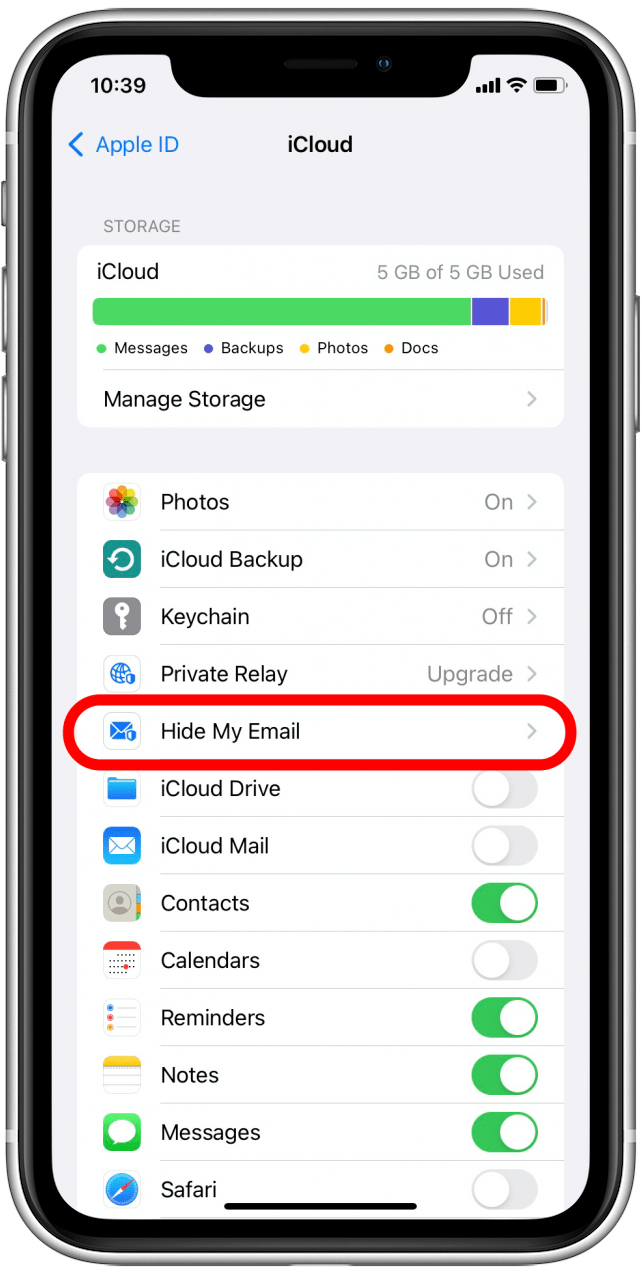
- Tap iCloud.
![iCloud]()
- Tap Hide My Email.
![Hide My Email]()
- If you are not already subscribed to iCloud+, tap Subscribe to iCloud+. Otherwise, you can skip to step 10.
![Subscribe to iCloud+]()
- Tap Subscribe to iCloud+ again. The default plan you will sign up for will grant you 50 gigabytes of iCloud storage, along with access to Hide My Email, Private Relay, HomeKit Secure Video, and Family Sharing. You can also select See Other Plans to select an upgraded plan.
![Subscribe to iCloud]()
- Tap Subscribe.
![Sign in]()
- Enter your password and tap Sign In.
![Sign up for iCloud+]()
- Tap Done.
![Done]()
- Tap Create New Address.
![Create New Address]()
- Hide My Email will generate a new, random address that forwards to your personal inbox. Tap Continue.
![Continue]()
- Now you can label your address and add notes. This can help you remember which services you've signed up for or forms you've filled out with this email address.
![Label address]()
- Tap Next.
![Next]()
- Tap Done.
![Done]()
- Now you'll see your new dummy email on the Hide My Email screen.
![Dummy email address]()
Now that you have your fake email address, you can use it to sign up for anything that requires an email address and get all associated emails forwarded to your personal inbox.
Deactivate & Delete a Dummy Email Address
- If you want to edit or stop receiving messages sent to this email address, tap it.
![Dummy email address]()
- On this screen, you can change the label associated with the email address, add a note, or tap Deactivate Email Address.
![Deactivate Email Address]()
- Tap Deactivate.
![Deactivate]()
- If you want to reactivate or totally delete this address, you can now tap on Inactive Addresses.

- Tap the address you'd like to delete.
![Inactive address]()
- Tap Delete Address, or, if you'd like to use this address again, you can tap Reactivate Address.
![Delete address]()
How to Use Hide My Email in macOS Monterey
Hide My Email can also be used with macOS Monterey. Here's how:
- Open System Preferences.
![System Preferences]()
- Select Apple ID.
![Apple ID]()
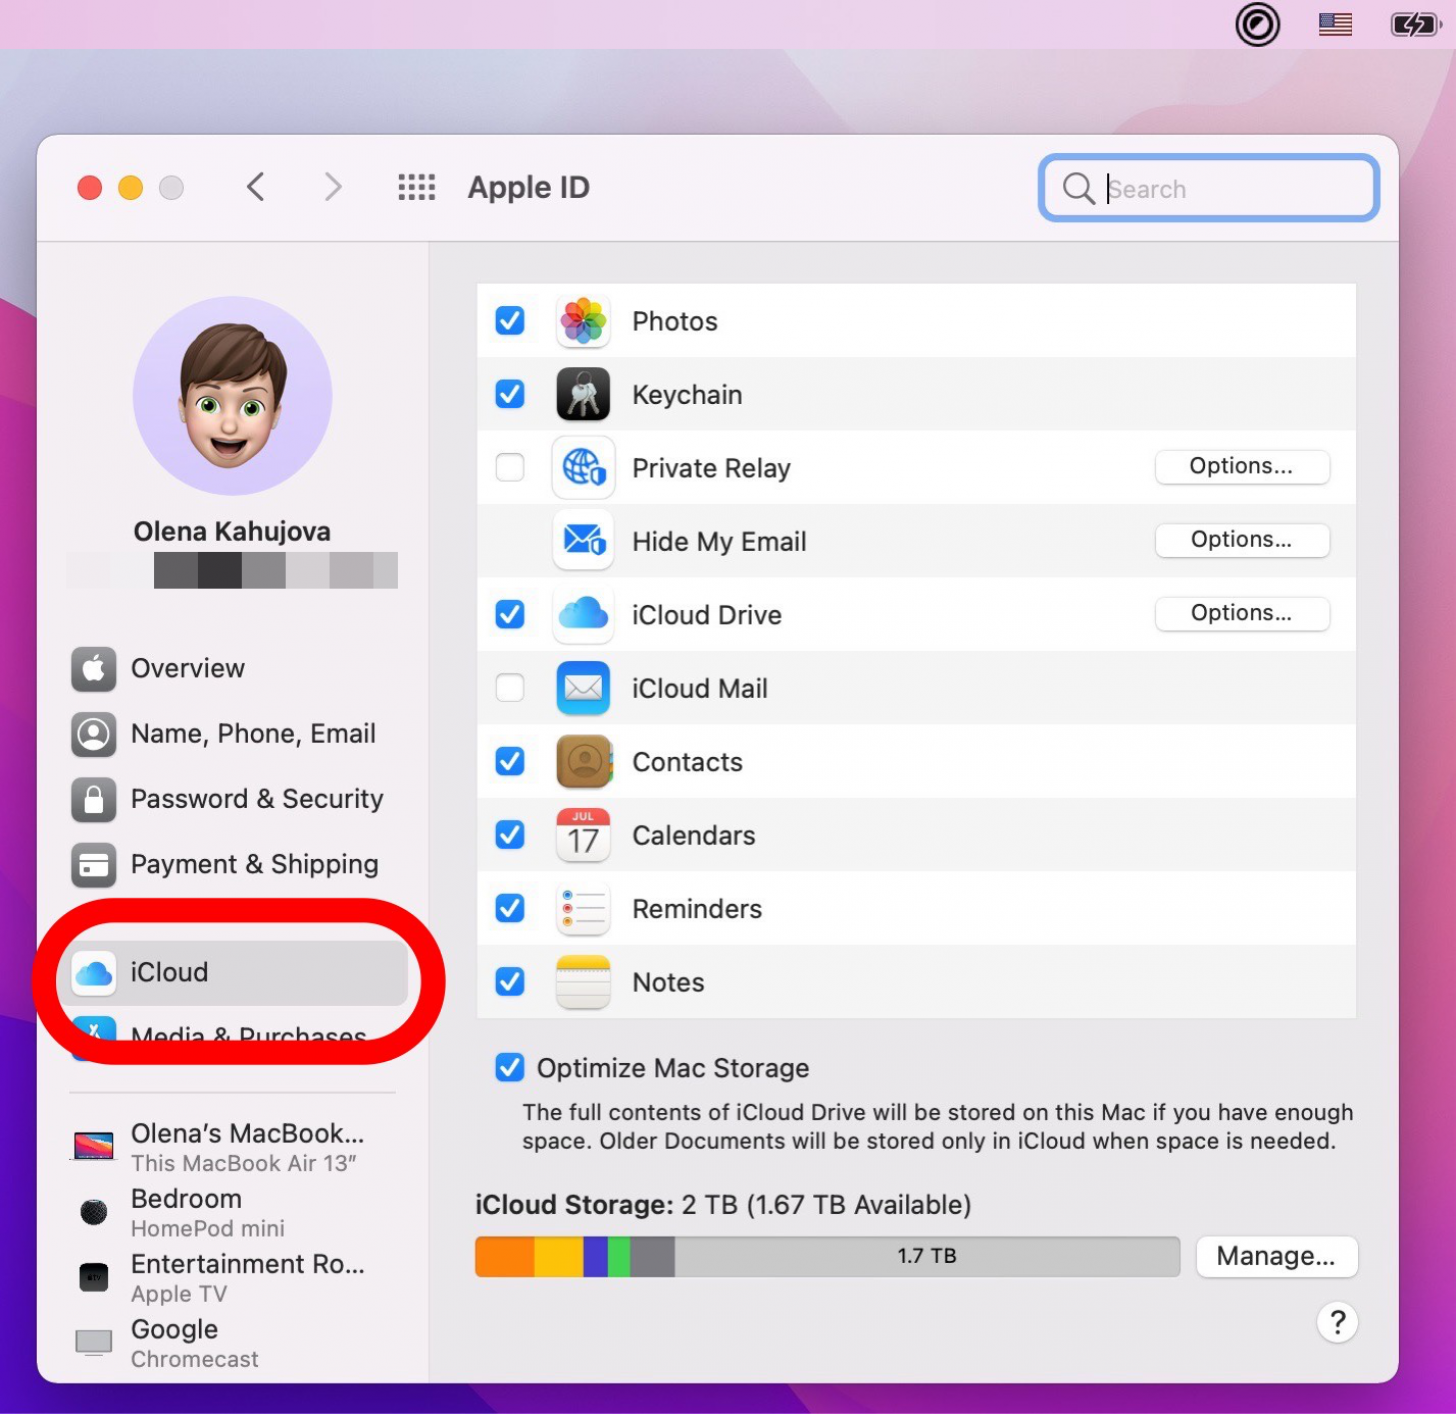
- Click iCloud.
![iCloud]()
- Click Options... next to Hide My Email.
![Options]()
- Click the Plus button.
![Add]()
- Click Continue.
![Continue]()
- Add a label and note and click Continue.
![Continue]()
- Click Done.
![Done]()
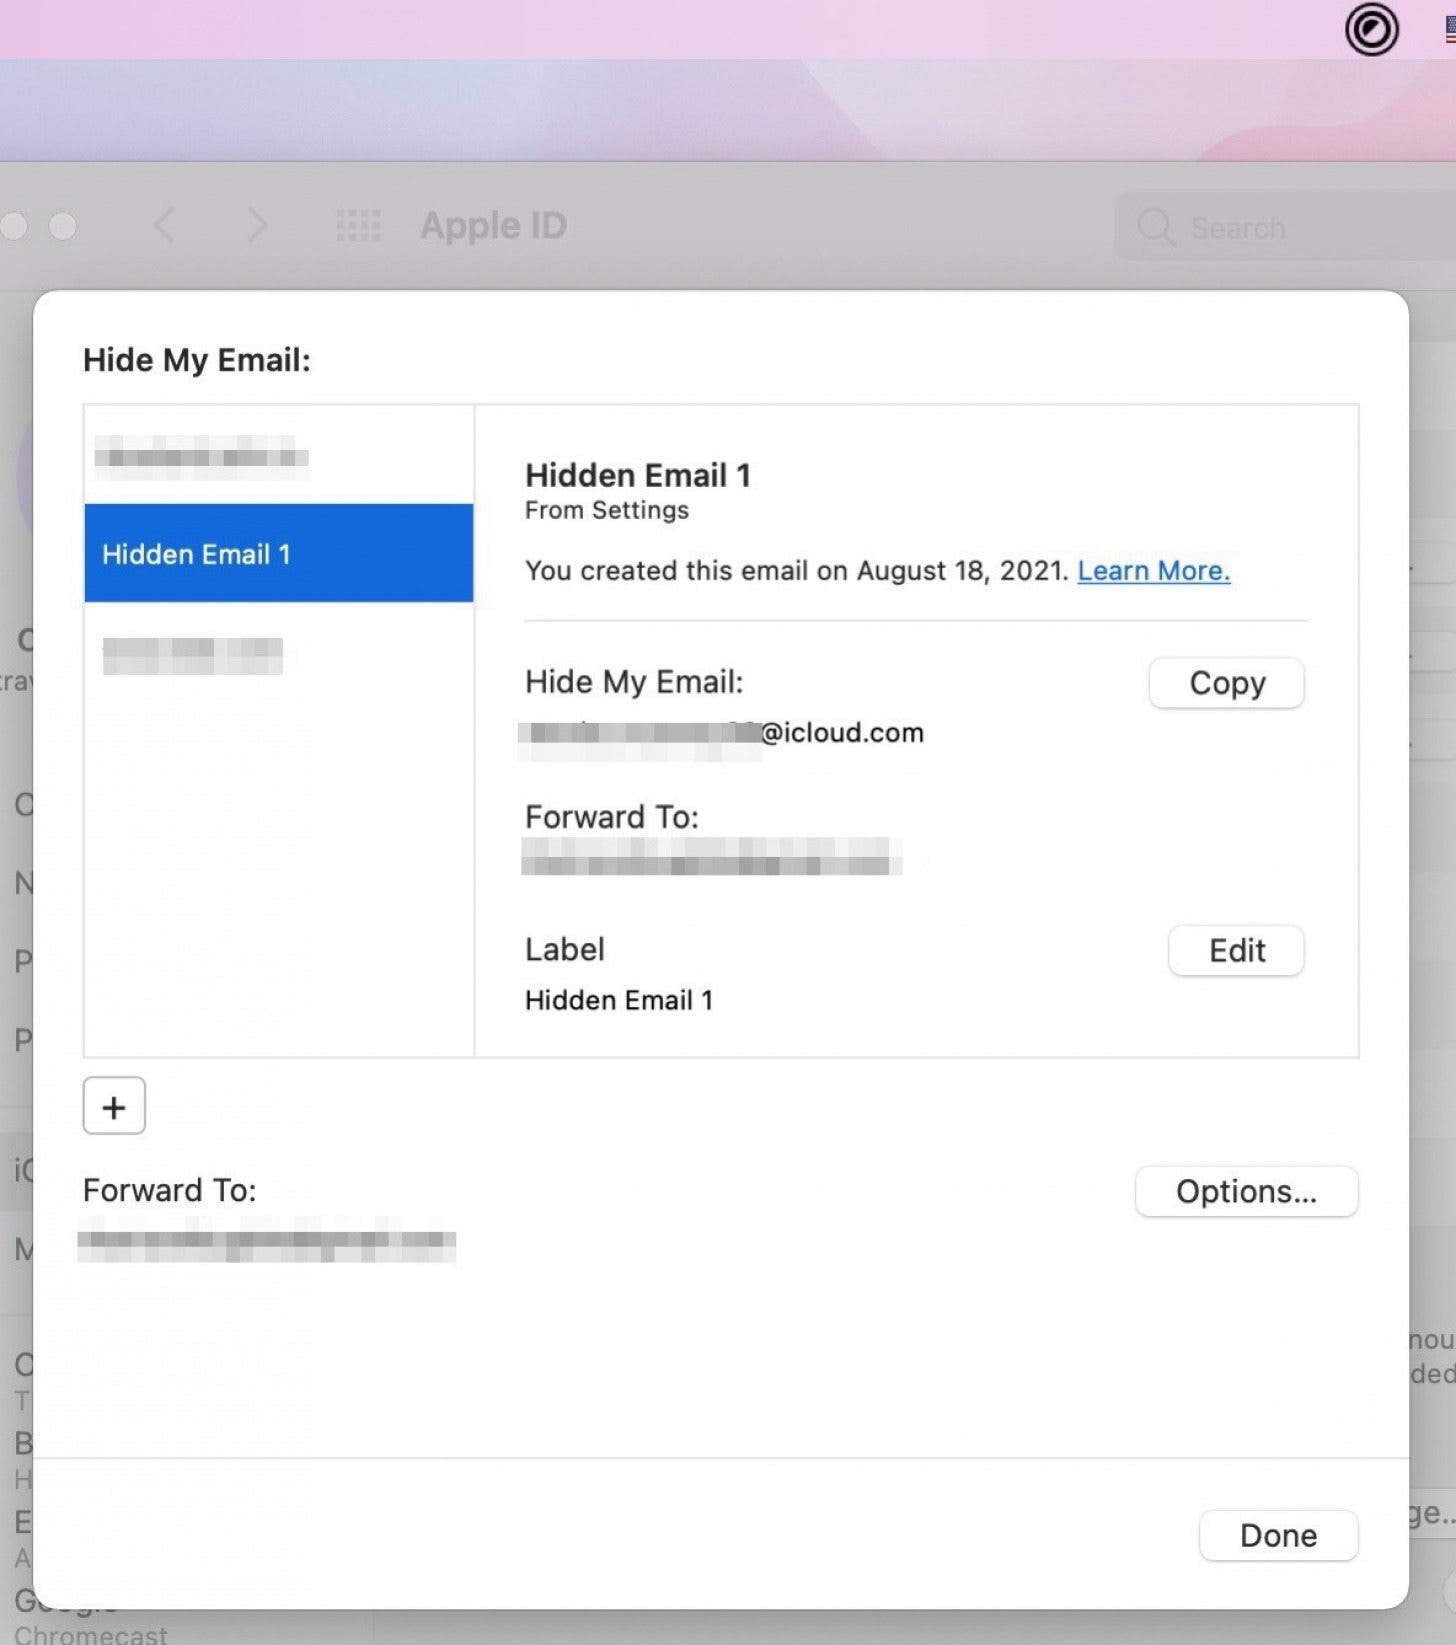
- Now you can see your new email address on the Hide My Email screen. You can copy it or edit if needed.
![Hidden Email]()


