* This article is from our Tip of the Day newsletter. Sign Up. *
When you subscribe to iCloud+, you gain access to Hide My Email. Hide My Email allows you to generate dummy email accounts that automatically forward any emails sent to that account to your real email address. The advantage here is that you don't have to share your email address with a site or person you don't trust, and they can't sell your real email address to other websites. But is hiding your email address really necessary for you? Let's get into it!
Why You'll Love This Tip
- Keep your email safe and secure by creating a dummy email account to share with strangers.
- Easily delete or cancel dummy email accounts to quickly stop receiving annoying junk mail.
- Prevent sites from selling your real email to third parties.
How to Use Hide My Email
System Requirements
To use this tip, you'll need an iPhone 6S or newer running iOS 15 or later, or an iPad running iPadOS 15 or later.
Hide My Email, a feature you get after signing up for iCloud+, provides you with a unique, randomly generated email address (or multiple addresses) that you can use whenever you'd prefer to keep your personal or business email private. This is especially useful if you suspect that the recipient of your emails is likely to share your information with other ad agencies or third parties. Hide My Email works as a failsafe for junk mail overload. Once you start getting spam in your email, you can deactivate these dummy accounts and never hear from the spammers again.

However, it's important to remember that you should share a legitimate email with trusted websites and critical services like your bank, your landlord, your doctor, etc.
How to Activate Hide My Email
Before you activate Hide My Email, you'll need to sign up for iCloud Plus. If you like tips about how to use your Apple devices, be sure to sign up for our free Tip of the Day!
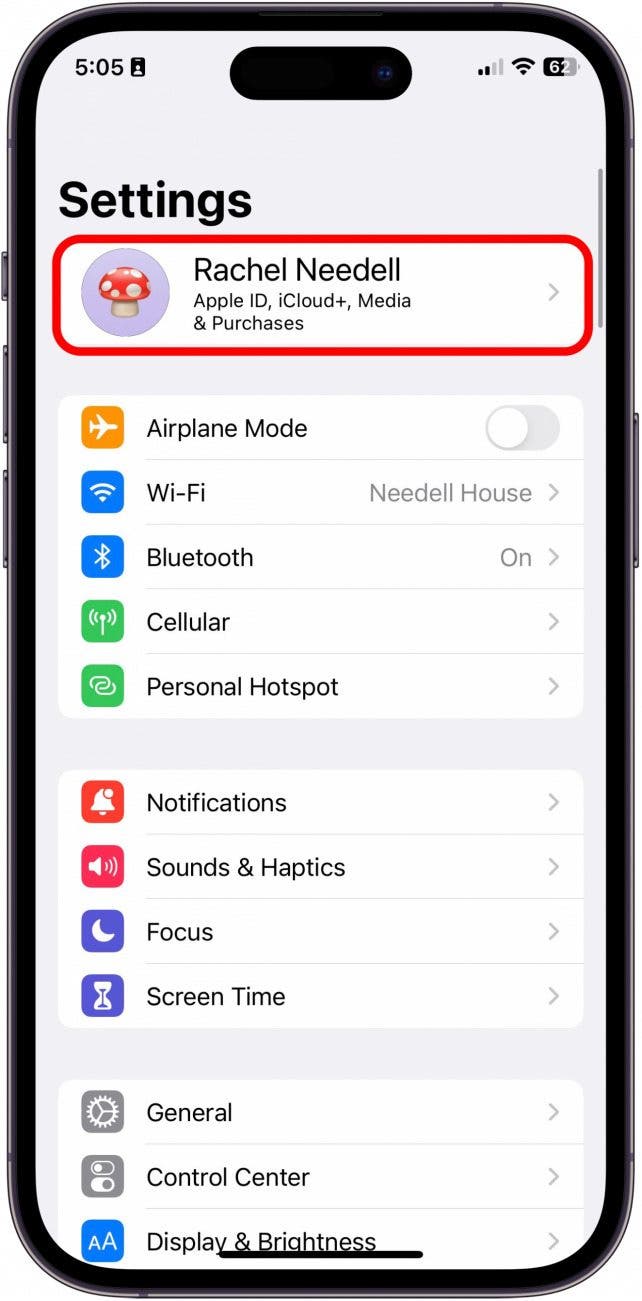
- Open Settings.
![Open Settings.]()
- Tap on your profile.
![Tap on your profile.]()
- Tap iCloud.
![Tap iCloud.]()
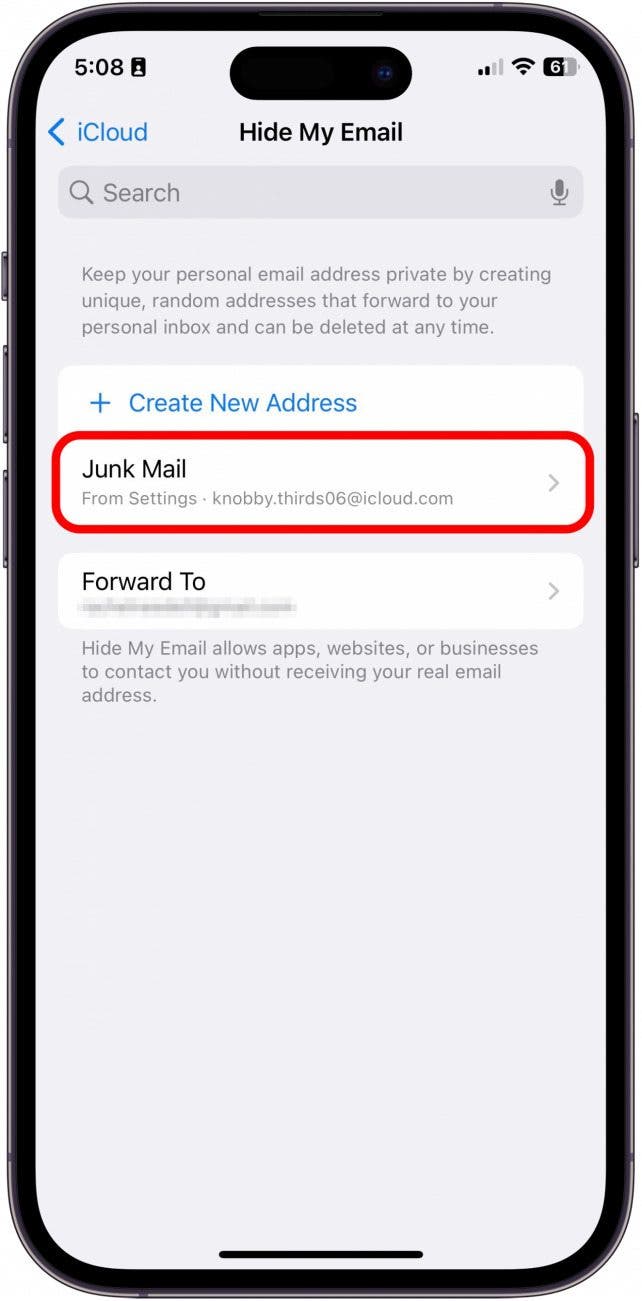
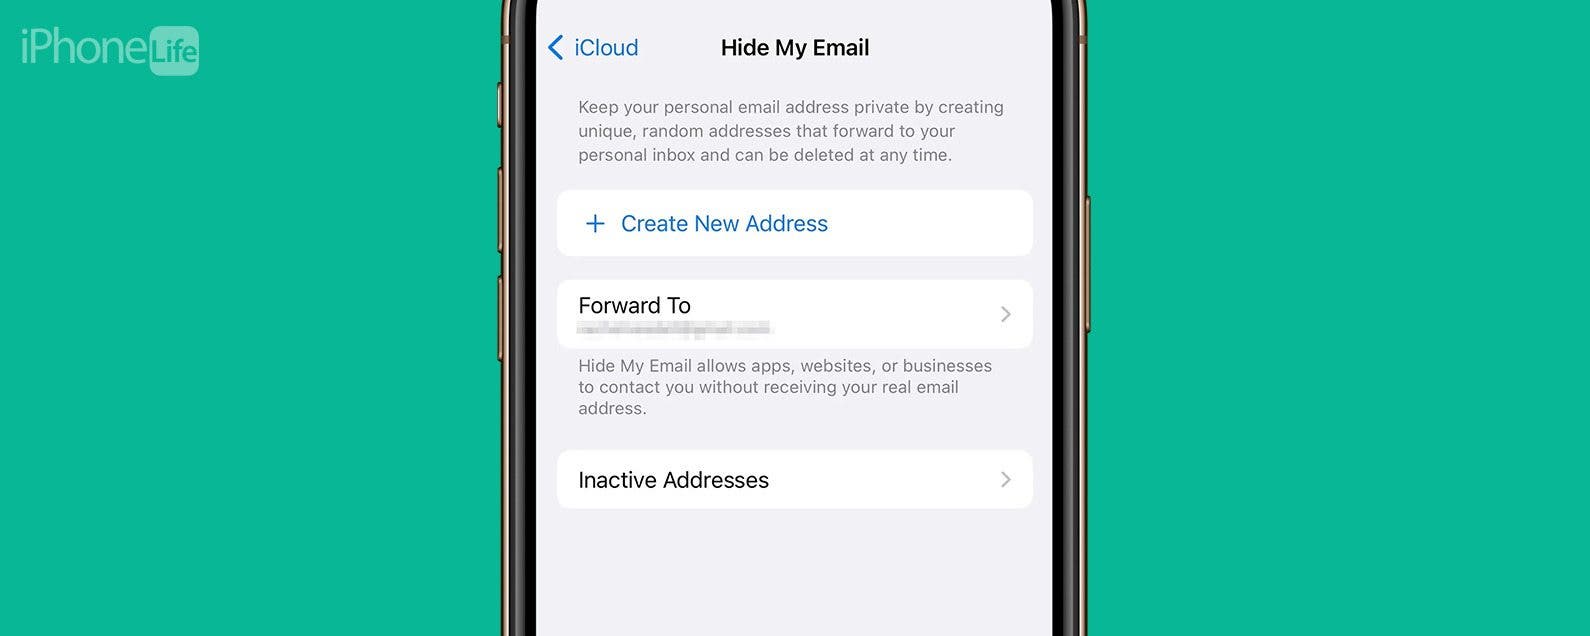
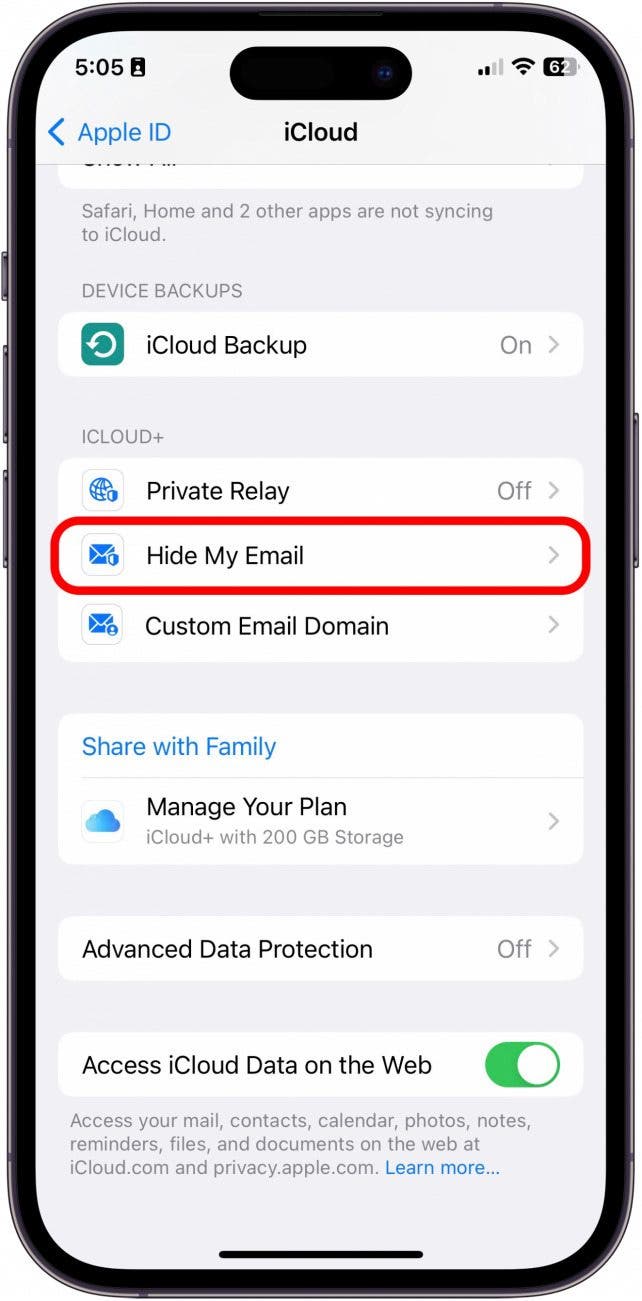
- Tap Hide My Email.
![Tap Hide My Email.]()
- Tap the Forward To field to make sure the dummy email forwards to the account of your choice.
![Tap the Forward To field to make sure the dummy email forwards to the account of your choice.]()
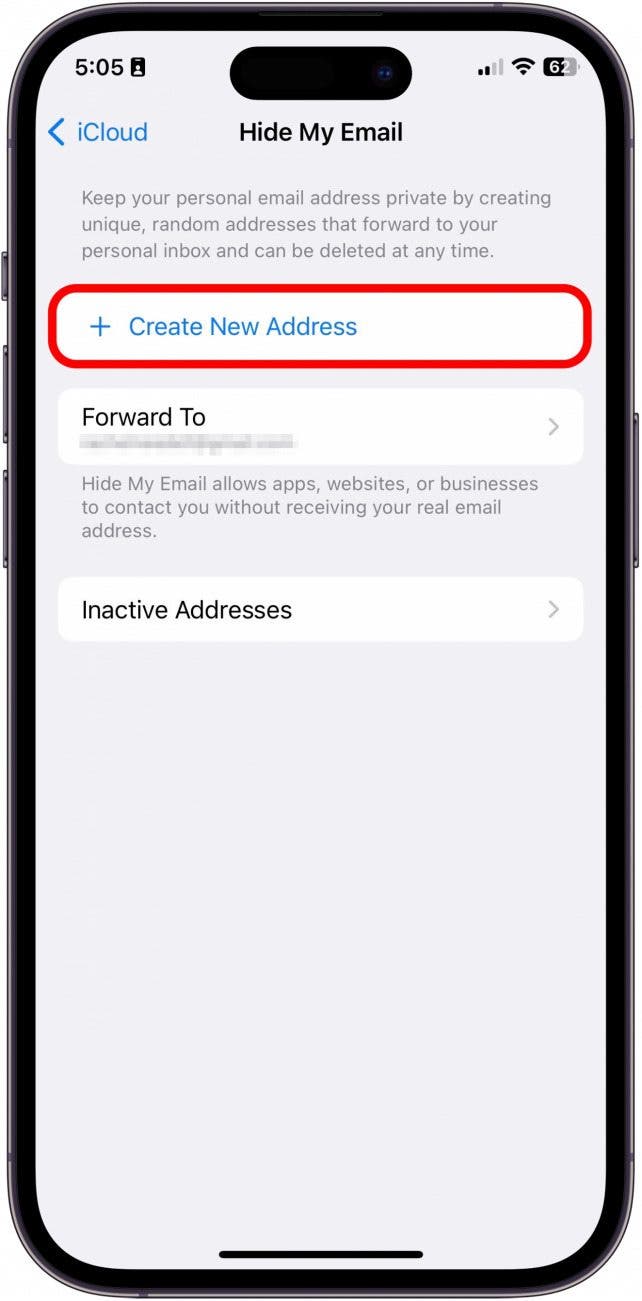
- Then, tap Create a New Address.
![Then, tap Create a New Address.]()
- A random auto-generated email will pop up. Either tap Use Different Address to generate a new one or continue to the next step.
![A random auto-generated email will pop up and you can either tap Use Different Address to generate a new one or tap Continue.]()
- Label your address and add notes. This can help you remember which services you've signed up for or forms you've filled out with this email address.
![You can label your address and add notes. This can help you remember which services you've signed up for or forms you've filled out with this email address.]()
- Tap Next.
![Tap Next.]()
- Tap Done.
![Tap Done.]()
- Now you'll see your new dummy email on the Hide My Email screen.
![Now you'll see your new dummy email on the Hide My Email screen.]()


Now that you have your fake email address, you can use it to sign up for anything that requires an email address and get all associated emails forwarded to your personal inbox.
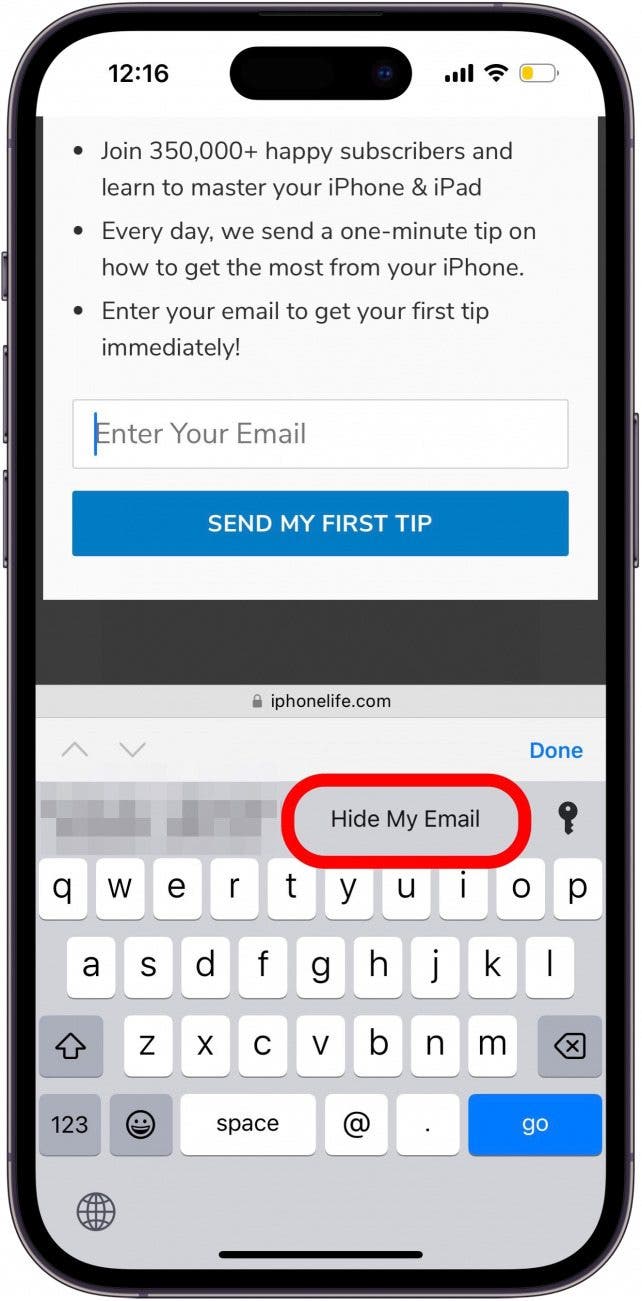
Note: On websites and some apps, your iPhone will automatically offer you the option to fill in a sign-up form with a dummy email address via Hide My Email. To generate a new dummy account, simply tap Hide My Email when it appears above your keyboard.
How to Deactivate Hide My Email
Now that you've learned how to create a false email address, here's how to deactivate it when you find you're getting spammed with junk mail.
- If you want to edit or stop receiving messages sent to this email address, tap it.
![If you want to edit or stop receiving messages sent to this email address, tap it.]()
- Tap Deactivate Email Address.
![Tap Deactivate Email Address.]()
- Tap Deactivate.
![Tap Deactivate.]()
- If you want to reactivate or totally delete this address, you can now tap on Inactive Addresses.
![If you want to reactivate or totally delete this address, you can now tap on Inactive Addresses.]()
- Tap the address you'd like to delete.
![Tap the address you'd like to delete.]()
- Tap Delete Address, or, if you'd like to use this address again, you can tap Reactivate Address.
![Tap Delete Address, or, if you'd like to use this address again, you can tap Reactivate Address.]()